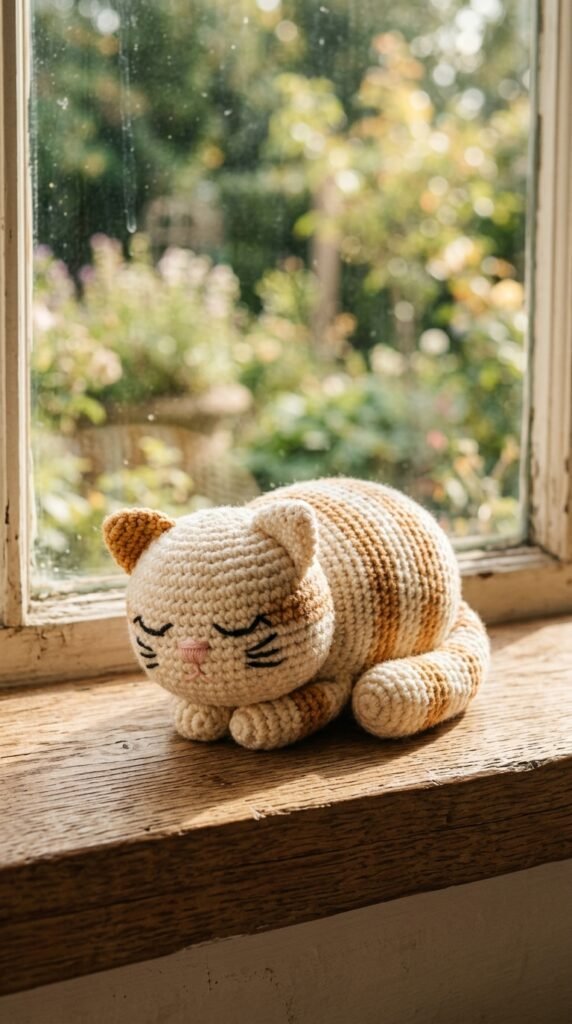
If you are a cat lover, you know the iconic “cat loaf”—that moment when a cat tucks all four paws underneath its body, transforming into a perfectly round, cozy rectangle of fluff. This “Lazy Loaf” pattern is designed to capture that exact aesthetic. With his closed eyes, tucked-in paws, and stripes, he is the ultimate companion for your windowsill or bedside table.
This project is a joy to create because of its unique, oblong shape, which is a departure from the standard spherical amigurumi. Let’s get stitching!
Project Overview
- Skill Level: Intermediate
- Finished Size: Approx. 6 inches long
- Time Required: 5–7 hours
- Style Notes: The focus is on the “tucked” posture and the stripes. We will use color-carrying techniques to keep the stripes clean and the body sturdy.
What You’ll Need
- Yarn: DK or Sport weight cotton. Colors: Cream (Base), Soft Ginger/Orange (Stripes).
- Hook: 2.5mm or 3.0mm.
- Extras: Polyester fiberfill, tapestry needle, stitch markers, and pink embroidery thread for the nose.
The Pattern
The Body (The “Loaf”)
Start with Cream yarn.
- Ch 12.
- Sc in 2nd ch from hook and next 10 ch. Rotate and sc down the other side of the foundation chain (22 total).
- [Inc, 9 sc, inc, inc, 9 sc, inc] (26)
- [Inc, 11 sc, inc, inc, 11 sc, inc] (30)
- Continue working in rounds, increasing until you have 40 stitches around.
6-15. Work even (sc in each st). Change to Ginger yarn every 3 rounds to create the striped loaf effect.
16-20. Begin decreasing evenly until the piece is closed.
Note: Stuff the body firmly so it holds a rectangular “loaf” shape rather than a round ball.
The Head
- MR, 6 sc (6)
- Inc around (12)
- [1 sc, inc] 6 times (18)
- [2 sc, inc] 6 times (24)
- [3 sc, inc] 6 times (30)
- [4 sc, inc] 6 times (36)
7-12. Sc around (36) - [4 sc, dec] 6 times (30)
- [3 sc, dec] 6 times (24)
- [2 sc, dec] 6 times (18)
Stuff firmly and FO.
The Tucked Paws (Make 2)
- MR, 6 sc (6)
- [1 sc, inc] 3 times (9)
3-4. Sc around (9)
Stuff very lightly, then pinch flat to sew to the front of the body.
Expert Tips for the “Cat Loaf” Look
1. Shaping the “Loaf”
To get that authentic loaf shape, the stuffing is key. As you stuff the body, use your fingers to flatten the top and press the sides inward slightly. You aren’t aiming for a sphere; you are aiming for a soft, rounded brick. Adding a little extra weight in the base (like a small bag of glass beads) helps the cat sit flat on the window ledge without rolling over.
2. The Sleeping Expression
Since the cat is “lazy,” we want his eyes closed. Use your black embroidery thread to create two “V” or “U” shapes angled downwards. Adding tiny eyelashes at the edges makes the face look incredibly sweet. For the nose, use pink thread to make a small triangle just below the eyes, and add three small whisker marks on either cheek.
3. Creating Clean Stripes
If you hate weaving in ends, carry your yarn. When switching from Cream to Ginger, don’t cut the yarn. Leave the unused color running along the inside of your work (trapping it under your stitches). Since this is a solid-stuffed plush, the “carried” yarn won’t be seen from the outside!
4. The Ear Placement
The ears should be placed far apart on the top of the head—almost at the corners. This wide-set ear placement is what gives cats that “soft” look. For the ginger cat, use two colors (Cream for the inner ear, Ginger for the back) to give them depth.
A Note from One Maker to Another
Crocheting something as cozy as a sleeping cat is a wonderful way to wind down after a long day. The repetitive stitch, the soft yarn, and the promise of a cute companion at the end are all part of the therapy.
Ready to start your loaf?
Don’t worry about making the stripes perfect. Real cats have messy, beautiful markings, and your crochet cat will look just as lovable.