There is a certain kind of magic that happens when you sit down with a fresh skein of yarn and a vision in your head. I’ve been crocheting for over thirty years now—starting back when my grandmother showed me how to make a simple chain stitch on her porch—and yet, the thrill of seeing a garment come together never gets old.
Lately, I’ve been seeing these stunning off-the-shoulder “Bardot” style tops everywhere in high-end boutiques. They are feminine, timeless, and have that effortless “cool-girl” vibe. But let’s be honest: why buy it for eighty dollars when you can make it yourself with your own two hands?
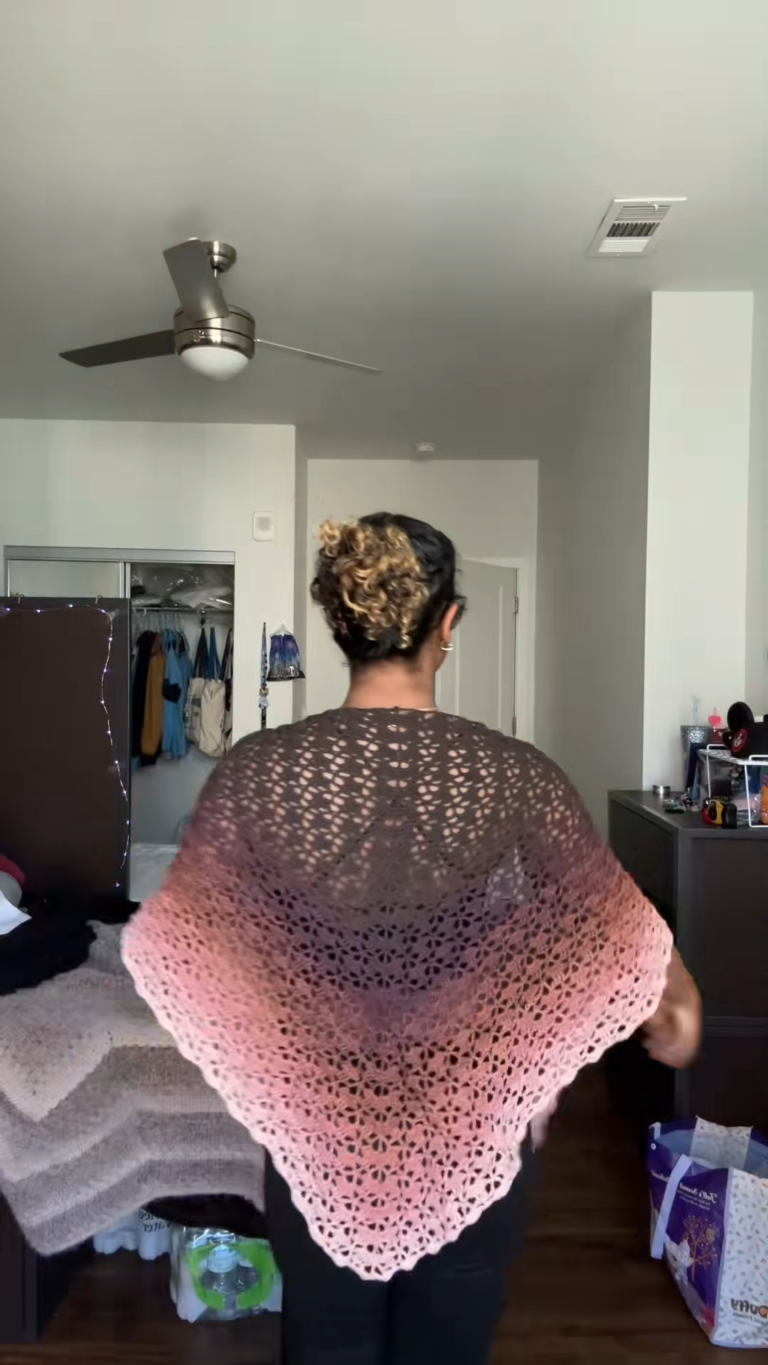
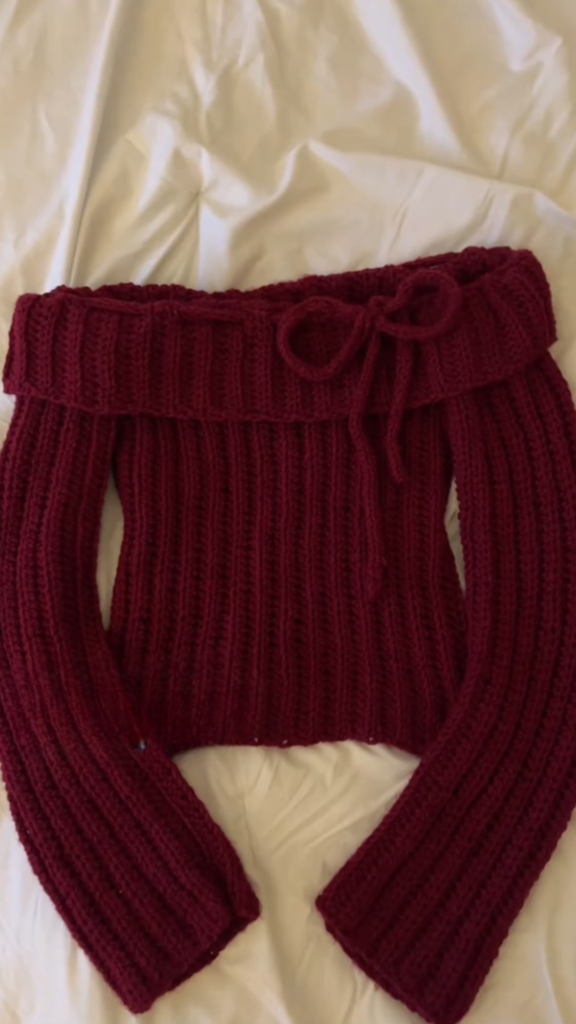
Today, I’m walking you through one of my favorite projects yet: a Deep Burgundy Ribbed Off-the-Shoulder Top. This piece features long, cozy sleeves, a beautiful folded collar, and a delicate bow detail that pulls the whole look together. It’s the kind of top that looks incredibly complicated but is actually built from simple shapes.
Whether you’re making this for yourself or as a gift for someone special, grab your favorite mug of tea, get comfortable, and let’s get started on this DIY crochet project.
Project Overview
- Project Level: Intermediate (Perfect for those who know the basics and want to learn about garment construction).
- Estimated Time to Complete: 15–20 hours (It’s a bit of a labor of love, but the results are worth every second!).
- Style: Romantic, Cozy, Off-the-Shoulder.
Materials You’ll Need
When I’m making a garment that’s going to sit close to the skin, I am very picky about yarn. You want something with “drape.”
- Yarn: 4–5 skeins of Medium Weight (Category 4) yarn. I personally recommend a Cotton/Acrylic blend. 100% acrylic can sometimes feel a bit “plastic-y” and stiff, whereas a blend provides the softness of cotton with the stretch of acrylic. For this specific look, a deep wine or burgundy color is stunning.
- Hook Size: 5.0mm (H) hook. If you tend to crochet very tightly, you might want to move up to a 5.5mm hook to ensure the ribbing stays stretchy.
- Measuring Tape: This is your best friend. We aren’t just following stitch counts; we are crocheting to fit your unique body.
- Tapestry Needle: For seaming and weaving in those pesky ends.
- Stitch Markers: Trust me, you’ll want these to mark where your sleeves attach.
Crochet Abbreviations (US Terms)
- Ch: Chain
- St: Stitch
- Sl st: Slip stitch
- Hdc: Half double crochet
- BLO: Back loop only (This is the secret to that gorgeous ribbing!)
Step-by-Step Instructions: The “Romance” Top
Step 1: The Body Panel (The Base)
We are going to work this top vertically. Instead of crocheting from the bottom up, we are crocheting side-to-side. This ensures the ribbing runs vertically, which is very slimming and stretchy.
- Measure: Measure from just under your armpit to where you want the crop top to end (usually around the waistline). This will be your starting chain length.
- Foundation: Create a slip knot and chain your desired length (e.g., 40–50 chains).
- Row 1: Hdc in the second chain from the hook and in each chain across. Turn.
- Row 2: Ch 1. Hdc in the BLO (Back Loop Only) of every stitch across.
- The Process: Repeat Row 2 until the piece is wide enough to wrap around your torso comfortably. It should be snug but not tight.
- Join: Once you have a large rectangle that fits around you, fold it in half and slip stitch the two ends together to create a tube. This is your bodice!
Step 2: The Long Sleeves
We follow the same logic as the body for the sleeves.
- Measure: Measure from your wrist to your armpit. This is your chain length.
- Foundation: Chain your length.
- Ribbing: Work in Hdc BLO just like you did for the body.
- The Fit: Continue until the rectangle can wrap around your arm. You want the wrist area to be slightly tighter, so you can switch to a smaller hook for the last few rows of the cuff if you like.
- Repeat: Make two of these! Slip stitch them into tubes.
Step 3: The Fold-Over Collar (The “Bardot” Look)
This is what gives the top its signature look. It’s essentially a very wide band that sits on top of the bodice and sleeves.
- Measure: Measure the circumference of your shoulders (where the top will sit).
- Foundation: Chain about 6–8 inches (this is the height of the fold).
- Ribbing: Again, work in Hdc BLO. You want this piece to be long enough to wrap all the way around your shoulders.
- Join: Slip stitch the ends together to form a very large loop.
Step 4: Assembly
This is where most people get nervous, but take a deep breath—it’s just like putting a puzzle together.
- Attach Sleeves: Lay your bodice flat. Use stitch markers to mark where the armholes should be. Sew or slip stitch the tops of the sleeves to the top corners of the bodice.
- Attach the Collar: Slip the large collar loop over the top of the bodice and sleeves. You are going to sew the bottom edge of this collar to the top edge of your bodice/sleeve assembly.
- The Fold: Once sewn, fold the collar down over the seam. It hides the join perfectly!
Step 5: The Finishing Touch (The Bow)
To get that cute center-front detail:
- Chain: Create a simple chain about 30–40 inches long.
- Weave: Thread this chain through the stitches at the center of the fold-over collar.
- Tie: Pull it slightly to create a gentle cinch and tie a beautiful bow.
Tips from My Experience
- The “Hdc BLO” Secret: When you work in the back loop only, you get a “ridge” on one side. This makes the fabric act like an accordion. It’s why this easy crochet pattern fits so many different body types!
- Don’t Forget to Block: If your ribbing looks a bit “scrunchy” or uneven, give it a light steam block. It relaxes the fibers and makes the top hang much more professionally.
- Check the Length: Before you finish the body, hold the “tube” up to yourself. Remember that the weight of the sleeves and the collar will pull the top down about an inch or two.
Common Mistakes to Avoid
- Crocheting the Collar Too Tight: The collar needs to be stretchy enough to stay on your shoulders without cutting off your circulation. If it’s too tight, it will constantly “pop up” toward your neck.
- Losing Stitches: It is very easy to lose a stitch at the end of a row when doing ribbing. I always count my stitches every 5 rows just to be safe.
- Using Heavy Wool: If you use a very heavy, 100% wool yarn, this top will be quite heavy and might sag. Stick to those lighter blends for the best silhouette.
Why You’ll Love This Pattern
This crochet pattern is the perfect blend of style and comfort. Because it’s ribbed, it’s incredibly forgiving. It hugs your curves in all the right places but has enough “give” that you don’t feel constricted.
I also love that it’s a “modular” pattern. You can make the sleeves shorter for a summer look, or make the body longer if you aren’t a fan of the cropped style. It’s a step by step crochet journey that results in a piece you’ll be proud to wear for years.
Conclusion
There is nothing quite like the feeling of wearing something you made with your own hands. Every time someone asks me where I got my burgundy top, I get to smile and say, “Oh, I just whipped this up!”
Crochet is more than just a hobby; it’s a way to create a slow-fashion wardrobe that fits your body and your personality perfectly. I hope this guide helps you feel confident in tackling your own off-the-shoulder masterpiece.