

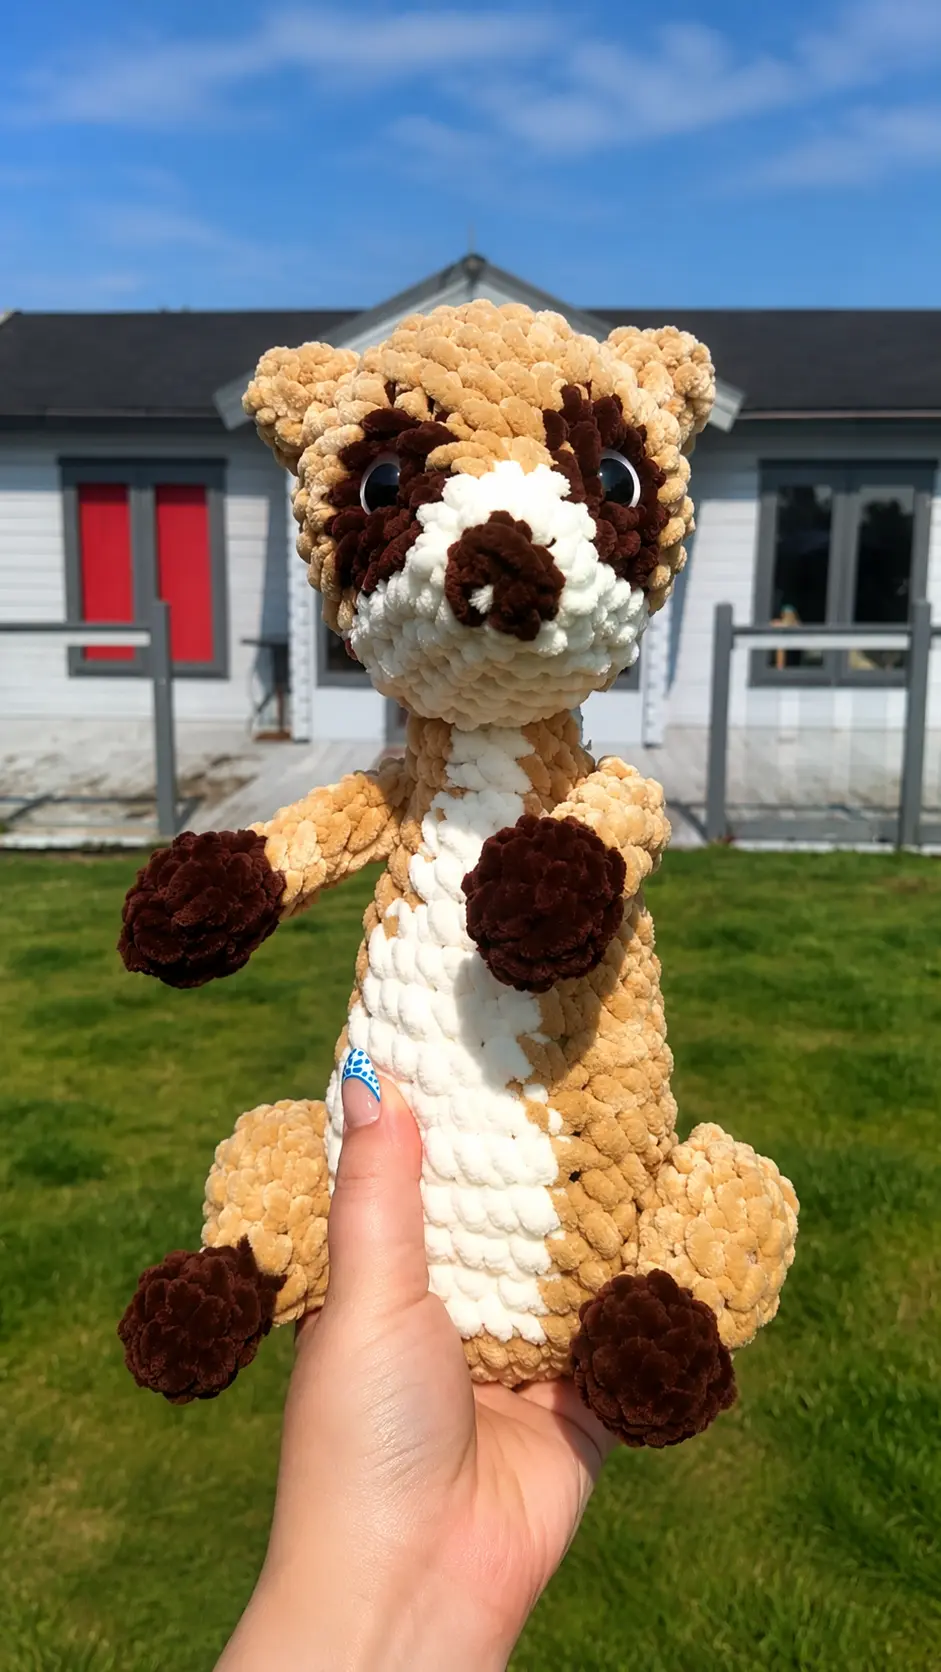
Last month, my husband and I took our grandson to the zoo on a Saturday morning. We expected him to be most excited about the lions or giraffes, but instead he spent nearly half an hour watching the meerkats. They were popping in and out of their little tunnels, standing on their back legs, and looking around as if they were keeping watch over everyone. We all stood there laughing because they were so full of personality.
When we got home later that afternoon, I couldn’t stop thinking about those curious little faces. After unpacking and putting my feet up for a bit, I wandered into my craft room to see what yarn I had. I found a soft skein of chenille yarn that looked just right, made myself a cup of coffee, and started crocheting. Stitch by stitch, a tiny standing meerkat began to appear, and it brought back the same smile I had at the zoo.
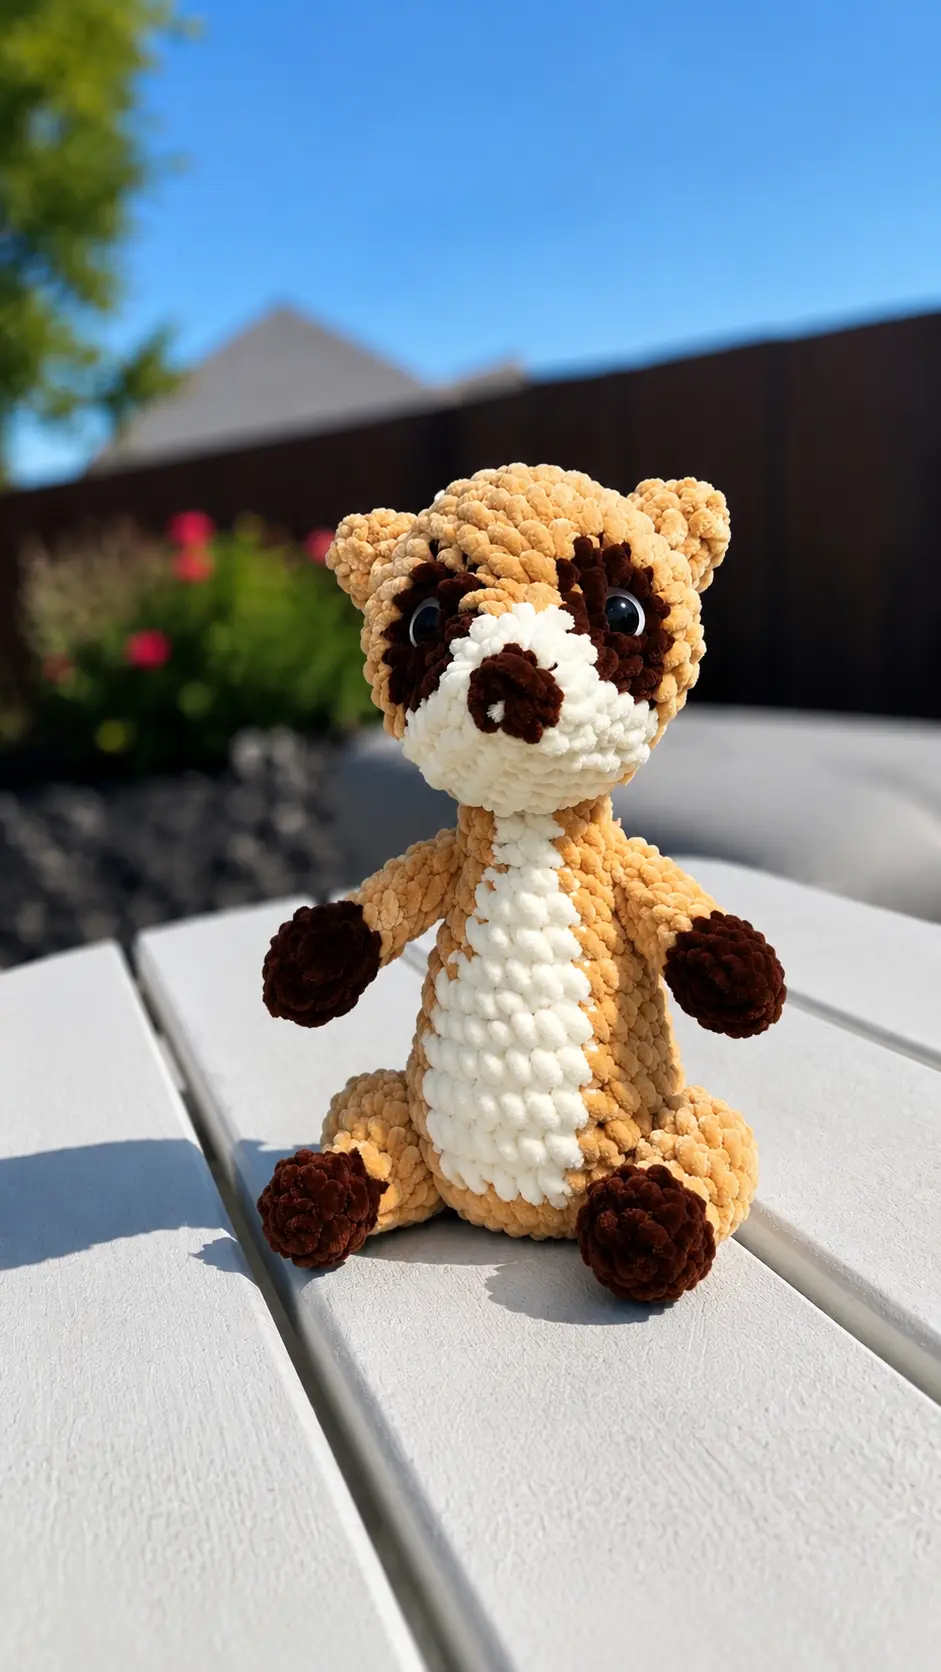
If you love making cute woodland animals, you’re going to enjoy this Free Amigurumi Pattern Mia the Meerkat Plush. It’s a fun project that works up beautifully with soft chenille yarn and has the sweetest little face. Whether you’re crocheting it for a child, an animal lover, or simply to add something adorable to your own collection, this little meerkat is sure to become a favorite. Grab your favorite hook, settle into a comfortable chair, and let’s crochet this charming little friend together.
Materials Needed
- Yarn and hook of your choice (I use Yarnsmiths Chenille with a 4.5mm hook)
- Stitch Marker
- Stuffing
- Scissors
- Safety Eyes
- Needle for sewing
Finished Size
Finished size will vary based on yarn weight, hook size, and individual tension.
Abbreviations
- R: Round
- MR: Magic Ring
- SC: Single Crochet
- INC: Increase
- DEC: Decrease
- SLS: Slip Stitch
- BLO: Back Loop Only
- X_: Times To Repeat
- CC: Colour Change
- Black = Body colour
- Blue = Patch and feet colour
- Green = Belly colour
Pattern Instructions
Head
R1: 4SC in MR (4)
R2: In BLO (1SC, INC)X2 (6)
R3: INC Around (12)
R4: 4SC, 2SC, 2SC, 2SC, 2SC (12)
R5: 3SC, INC, 1SC, INC,1SC, INC, 1SC, INC, 2SC (16)
R6: 4SC, INC, 1SC, INC, 1SC, 1SC In the same ST 1SC, 1SC, 1SC In the same ST 1SC, 1SC, INC, 1SC, 2SC (21)
R7: 5SC, INC, 2SC, INC, 2SC, INC, 2SC, 1SC In the same ST 1SC, 2SC, INC, 1SC, 2SC (26)
R8: 7SC, (3SC, INC)X4, 1SC, 2SC (30) Cut patch colour
Add eyes between rounds 6&7 7 stitches apart in the eye patches
R9: 7SC, 23SC (30) cut belly colour
R10-11: SC Around (2 Rounds) (30)
R12: (4SC, DEC)X5 (25) Begin Stuffing
R13: (3SC, DEC)X5 (20)
R14: (2SC, DEC)X5 (15) Finish Stuffing
R15: (1SC, DEC)X5 (10)
R16: DEC Around (5)
FO.
Body
R1: CH6 Starting from the second chain from the hook 4SC, 3sc in the next ST, on the other side of the chain 3SC, INC in the last ST. (12)
R2: (1SC, INC)X6 (18)
R3: (2SC, INC)X6 (24)
R4: (3SC, INC)X6 (30)
R5-9: 1SC, 10SC, 19SC (5 Rounds) (30)
R10: 2SC, 1SC, DEC, 3SC, DEC, (3SC, DEC) X4 (24)
R11-13: 2SC, 6SC, 16SC (3 Rounds) (24)
R14: 2SC, DEC, 2SC, DEC, (2SC, DEC)X4 (18) Begin Stuffing
R15-16: 2SC, 4SC, 12SC (2 Rounds) (18)
R17: 1SC, DEC, 1SC, DEC, (1SC, DEC)X4 (12)
R18-19: 2SC, 2SC, 8SC (2 Rounds) (12) Finish Stuffing
FO. Leaving a long tail for sewing
Tail
R1: 4SC in MR (4)
R2-5: SC around (4 Rounds) (4)
CC to body colour
R6-10: SC around (5 Rounds) (4)
R11: INC around (8)
R12: (1SC, INC)X4 (12)
Do not stuff, FO. Leaving a long tail for sewing
Legs – Make 2
R1: 6SC in MR (6)
R2: (1SC, INC)X3 (9)
R3: SC around (9)
R4: 3DEC, 3SC (6) Stuff foot lightly
R5: SC around (6)
CC to body colour
R6: FLO 3INC, BLO 3SC (9)
R7: FLO (1SC, INC)X3, BLO 3SC (12)
R8: FLO (2SC, INC)X3, BLO 3SC (15)
R9: SC around (15)
R10: (3SC, DEC)X3 (12)
R11: (2SC, DEC) X3 (9) Stuff leg lightly
R12: (1SC, DEC)X3 (6)
R13: DEC around (3)
FO. Leaving a long tail for sewing
Arms – Make 2
R1: 6SC in MR (6)
R2: (1SC, INC)X3 (9)
R3: SC around (9)
R4: (1SC, DEC)X3 (6) Stuff hands lightly
CC to body colour
R5-10: SC around (6 rounds) (6)
Do not stuff arm, fold in half and SC along the edge. FO. Leaving a long tail for sewing.
Ears
Make 2
R1: 4SC in MR (4)
R2: (1SC, INC)X2 (6)
R3: SC around (6)
FO. Leave a long tail for sewing
Assembly
Attach head central to the belly mark
Attach tail between rounds 6&9
Attach ears between rounds 11&12
Attach legs either side of the body with the white belly in between, between rounds 5&7
Attach arms between rounds 16&17, if you would like you can attach the two hands in the middle to make the meerkat look like it is doing the classic standing position
Tips for Success
- Use a stitch marker at the start of every round so you do not lose track when changing colors.
- Keep your yarn tails long when fastening off to make assembly quick and neat.
- Stuff the body and head firmly, but leave the arms and tail un-stuffed or lightly stuffed so they lay flat.
- When making color changes across the eye patches and belly, carry your yarn carrying threads loosely inside to avoid pulling the stitches tight.
- Use sewing pins to secure the head, ears, legs, and arms in position before stitching them permanently.
- Stitching the two paws together in the front gives your meerkat that classic, curious standing pose.
Frequently Asked Questions
What hook size works best for chenille yarn in this pattern?
A 4.5mm hook works wonderfully with chenille yarn to keep stitches tight enough so stuffing does not peek through.
When should I insert the safety eyes?
Place the safety eyes between rounds 6 and 7 of the head, setting them 7 stitches apart directly inside the eye patch area.
Do I need to stuff the tail?
No, do not stuff the tail so it stays flexible and sits neatly against the back of the body.
How do I join the arms to the body?
Fold the top opening of each arm flat, single crochet across the edge to close, and sew between rounds 16 and 17.
Can I use standard worsted weight yarn instead of plush yarn?
Yes, you can use acrylic or cotton worsted weight yarn with a matching smaller hook like a 3.25mm or 3.5mm.
Conclusion
Creating your own sweet woodland creature is such a satisfying project, and this Free Amigurumi Pattern Mia The Meerkat Plush is a joy to work on. It brings so much character to a bookshelf or craft desk, and making it in cozy plush yarn makes it extra huggable. Be sure to save this pattern to your Pinterest boards so you can easily pull it up for your next yarn stash project. Happy crocheting, and enjoy every stitch!


Leave a Comment