

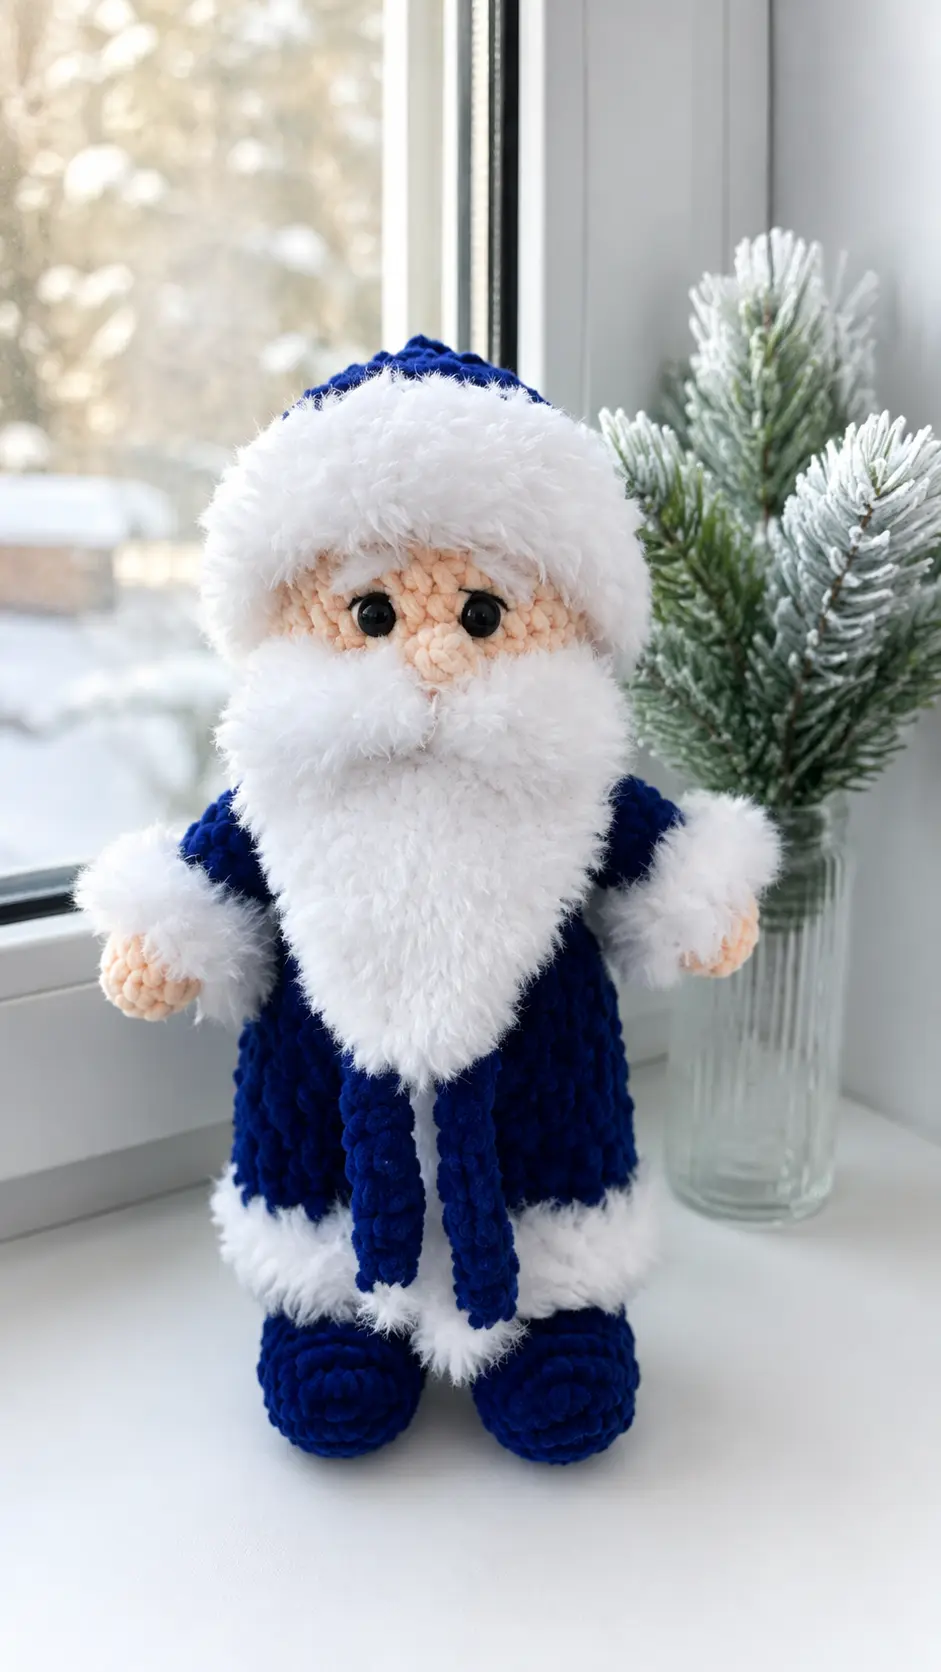
Last weekend, I took my granddaughter to a local holiday parade downtown. She waved excitedly at every float that passed by, but the biggest smile came when Santa Claus appeared at the very end, tossing candy canes and waving to all the children. On the drive home, she asked if Santa ever gets tired before Christmas. I laughed and told her he probably has a little help from people who love making handmade things.
That evening, I couldn’t stop thinking about our conversation. I wandered into my craft room, opened my yarn cabinet, and gathered a few classic Christmas colors—bright red, snowy white, black, and a touch of peach. With Christmas music playing softly in the background, I settled into my favorite chair and started crocheting. Watching Santa’s fluffy beard, round nose, and cheerful red suit come together made the whole project feel wonderfully festive, and by bedtime he was sitting proudly on my mantel.
This Easy Free Amigurumi Pattern Santa Claus Plush is a joyful project for anyone who loves adding handmade touches to the holiday season. The simple construction makes it enjoyable to crochet, while the classic Santa details give it plenty of charm. Display it beside your Christmas tree, tuck it into a holiday centerpiece, surprise someone with a handmade gift, or stitch a whole collection for your seasonal décor. However you use it, this cheerful Santa is sure to bring a little extra Christmas spirit to your home.
Materials Needed
- Himalaya Dolphin Baby yarn (colors: beige, black)
- Alize Velluto yarn (blue color used)
- Furry white yarn
- Crochet hook size 4
- Safety eyes with a diameter of 10 – 12 mm
- Plastic needle
- Marker
- Stuffing (hollofiber, synthetic fluff)
Finished Size
The size of the finished toy is about 35 cm.
Abbreviations
- MR – magic ring
- ch – chain stitch
- sc – single crochet
- sl st – slip stitch
- hdc – half double crochet
- dc – double crochet
- inc – increase
- dec – decrease
Pattern Instructions
Head:
We crochet with beige yarn.
- 1. 6 sc in MR
- 2. 6 inc (12)
- 3. (1 sc, inc)*6 (18)
- 4. 1 sc, inc, (2 sc, inc)*5, 1 sc (24)
- 5. (3 sc, inc)*6 (30)
- 6. 2 sc, inc, (4 sc, inc)*5, 2 sc (36)
- 7-12. 36 sc
Insert safety eyes between rounds 9 and 10, at a distance of 5 sc.
- 13. 2 sc, dec, (4 sc, dec)*5, 2 sc (30)
- 14. (3 sc, dec)*6 (24)
- 15. 1 sc, dec, (2 sc, dec)*5, 1 sc (18)
- 16. (1 sc, dec)*6 (18)
Stuff, leave a thread for sewing.
Nose:
We crochet with beige yarn.
- 1. 6 sc in MR
- 2. 6 inc (12)
Pull the opening closed. Stuff a little. Fasten off and cut the thread, leaving an end for sewing.
Arms (2):
We crochet with beige yarn.
- 1. 6 sc in MR
- 2. 6 inc (12)
- 3. 12 sc
- 4. (2 sc, dec)*3 (9)
Change yarn to blue. We crochet for the back loops of stitches.
- 5. 9 sc
- 6-8. 9 sc
- 9. 7 sc, dec (8)
- 10-12. 8 sc
We stuff the lower part. Fold the piece in half, crochet across both parts 4 sc. Fasten off and cut the thread, leaving an end for sewing. Attach white furry yarn to round 5 and crochet 2 rounds of sc (9)
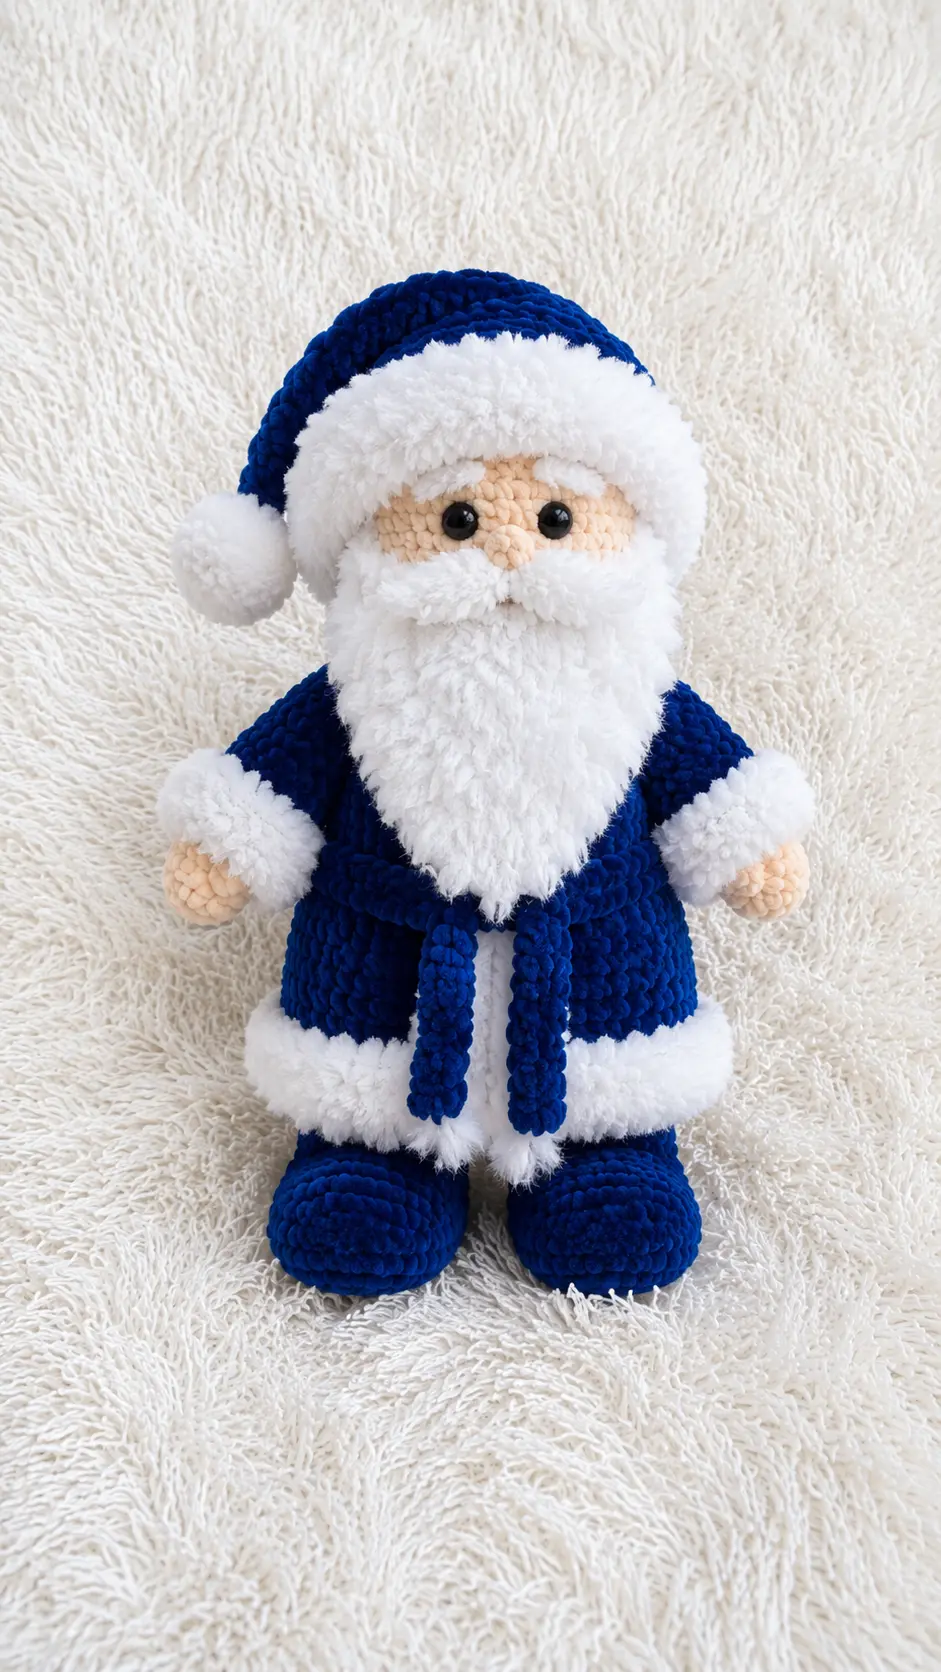
Legs Body:
First we crochet 2 legs. We crochet with black yarn.
- 1. 6 sc in MR
- 2. 6 inc (12)
- 3. (1 sc, inc)*6 (18)
- 4. 18 sc
- 5. 4 sc, 5 dec, 4 sc (13)
- 6-8. 13 sc
Change yarn to beige.
- 9. We crochet for the back loops of stitches: 13 sc
- 10. 13 sc
Change yarn to blue.
- 11. 13 sc
On the first leg, fasten off and cut the thread. On the second leg, crochet another 2 sc (if needed, look so that it is even) and continue crocheting the body:
- 12. 2 ch, connect to the first leg, 13 sc along the first leg, 2 sc along the ch, 13 sc along the second leg, 2 sc along the ch (30)
- 13-16. 30 sc
- 17. (3 sc, dec)*6 (24)
- 18. 24 sc for the back loops of stitches.
- 19-20. 24 sc
- 21. (2 sc, dec)*6 (18)
- 22-23. 18 sc
We stuff tightly.
- 24. (1 sc, dec)*6 (12)
- 25. 6 dec (6)
Fasten off and cut the thread, pull the opening closed.
Coat:
Attach blue thread to round 18, make 2 ch and crochet dc in each stitch (24 dc). Crochet 3 rounds of 24 dc. Work around the edge with white furry yarn – 2 rounds of sc (24). Fasten off and cut the thread.
Belt:
We crochet with blue yarn. Cast on a chain of 81 ch and crochet 80 sc along it. Fasten off and cut the thread.
Hat:
We crochet with blue yarn.
- 1. 6 sc in MR
- 2. 6 inc (12 sc)
- 3. (inc, sc)*6 (18)
- 4. (2 inc, sc)*6 (24)
- 5. (3 inc, sc)*6 (30)
- 6. (4 inc, sc)*6 (36)
- 7. (inc, 11 sc)*3 (39)
- 8-9. 39 sc
Fasten off and cut the thread. Change yarn to white furry:
- 10-12. 39 sc
Fasten off and cut the thread. Crochet with white furry yarn sl st along round 9 of the hat. Fasten off and cut the thread.
Beard:
We crochet with white furry yarn from bottom to top. Cast on 2 ch and then crochet in turning rows to the desired length, making an increase in each last stitch of the row. I got 12 rows. Fasten off and cut the thread, leaving an end for sewing.
Moustache (2 pcs):
We crochet with white furry yarn on the same principle as the beard. Fasten off and cut the thread, leaving an end for sewing if you will sew.
Assembly and Details:
- Embroider eyebrows, eyelashes.
- Sew nose to the head.
- Sew head to the body.
- Sew hands to the body.
- From the head to the very bottom of the coat, crochet with white furry yarn sc.
- Put hat on the head.
- Tie the belt onto the coat.
- Sew beard to the head.
- Glue or sew moustache.
Santa Claus is ready! Crochet for your own delight and give joy to your loved ones!
Tips for Success
- Take your time with novelty yarn: White furry yarn creates a soft, realistic beard and trim, but it can make stitches hard to see. Feel your stitches with your fingers as you work.
- Keep tension firm with plush yarn: Velvety yarns like Himalaya Dolphin Baby and Alize Velluto expand easily. Use a steady stitch tension so your fiberfill stuffing does not show through.
- Place safety eyes early: Position your safety eyes securely between rounds 9 and 10 of the head before you work the decrease rounds and fill it with stuffing.
- Stuff the body firmly: Give the body plenty of polyfill stuffing so Santa stays upright and holds his shape well when standing on display.
- Only stuff lower arms: Stuffing only the hands and lower wrist section keeps the arms lying flat against Santa’s coat rather than sticking out sideways.
Frequently Asked Questions
What hook size works best for this project?
A size 4 mm crochet hook is used for this pattern, which creates nice, tight stitches with bulky plush yarn.
Can I use standard acrylic yarn instead of plush yarn?
Yes, you can use regular worsted weight or bulky acrylic yarn instead, though your finished Santa will turn out smaller in size.
How is the coat worked onto the body?
The coat is crocheted directly into the unworked front loops left behind from round 18 of the body using double crochet stitches.
Do I need prior experience with furry yarn?
Working with textured furry yarn is simple once you get used to feeling for the loops, making it great for adventurous crocheters.
How do I join the legs together?
You join the legs by making 2 chain stitches from the second leg and working single crochets across both the chains and both legs to start the body.
Conclusion
Working on cozy festive projects is such a delightful way to spend a quiet afternoon. This Free Amigurumi Pattern Santa Claus Plush makes a cheerful addition to any home during the holiday season, bringing a cozy, handmade touch to your living room. I hope you enjoy every single stitch while bringing this jolly little character to life!


Leave a Comment