

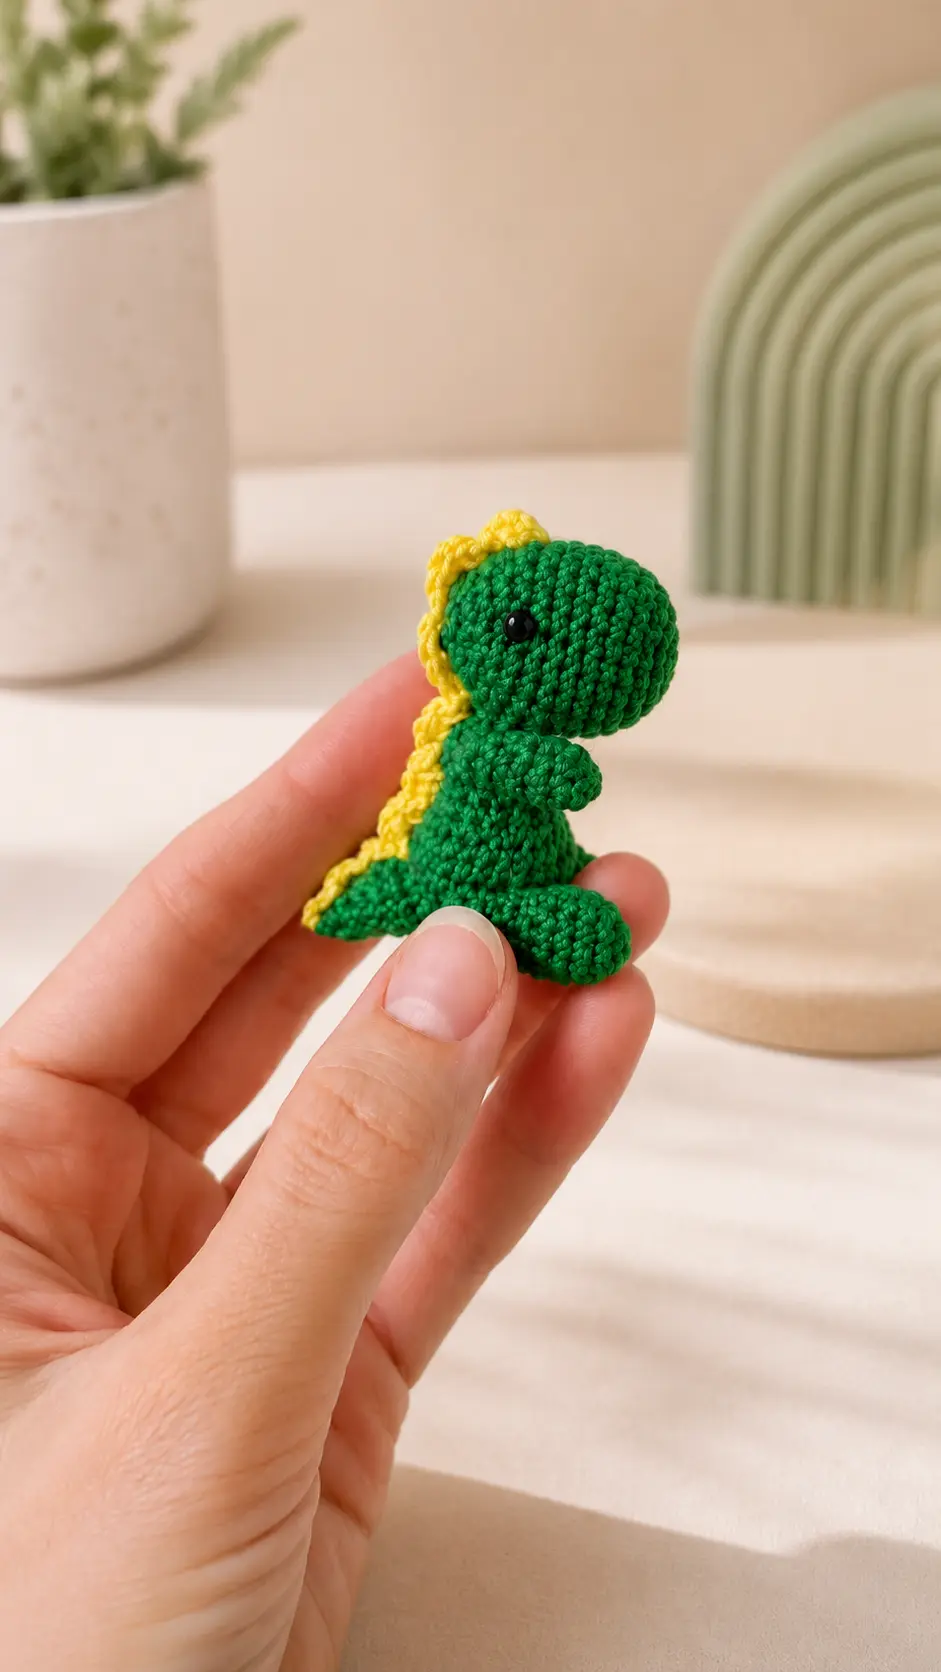
The idea for this tiny fellow came from the most unexpected place—a waiting room. I had gone with my sister to an appointment, and while she was checking in, I noticed a little boy sitting across from me with a bright green dinosaur clipped to his backpack. He kept making it “walk” along the arm of his chair, complete with tiny roaring noises whenever his mom wasn’t looking. I tried not to laugh, but eventually he caught me smiling and proudly held it up so I could get a better look.
That silly little dinosaur stayed in my head for the rest of the day. I had some green cotton yarn at home and just enough yellow left from another project, so that evening I decided to make my own miniature version. The body came together surprisingly fast, but it was the little spines along the back that really changed everything. As soon as they were finished, this tiny creature suddenly looked ready for an adventure.
That’s why I enjoy projects like this Free Amigurumi Pattern so much. You can start with only a handful of yarn and end the evening with an entire little character sitting in your palm. Try changing the spine color, give yours an unexpected combination of shades, or add a loop and turn it into a backpack charm. Mine is currently standing beside my computer looking far more confident than something made from a few scraps of yarn has any right to be.
Materials Needed
- Yarn (green and yellow), I use Vita Coco 100% cotton, 240m/50g.
- Crochet hook (I use size 1.5 mm).
- Plastic eyes size 3 mm, glue.
- Sewing needle and scissors.
- Fiberfill.
Finished Size
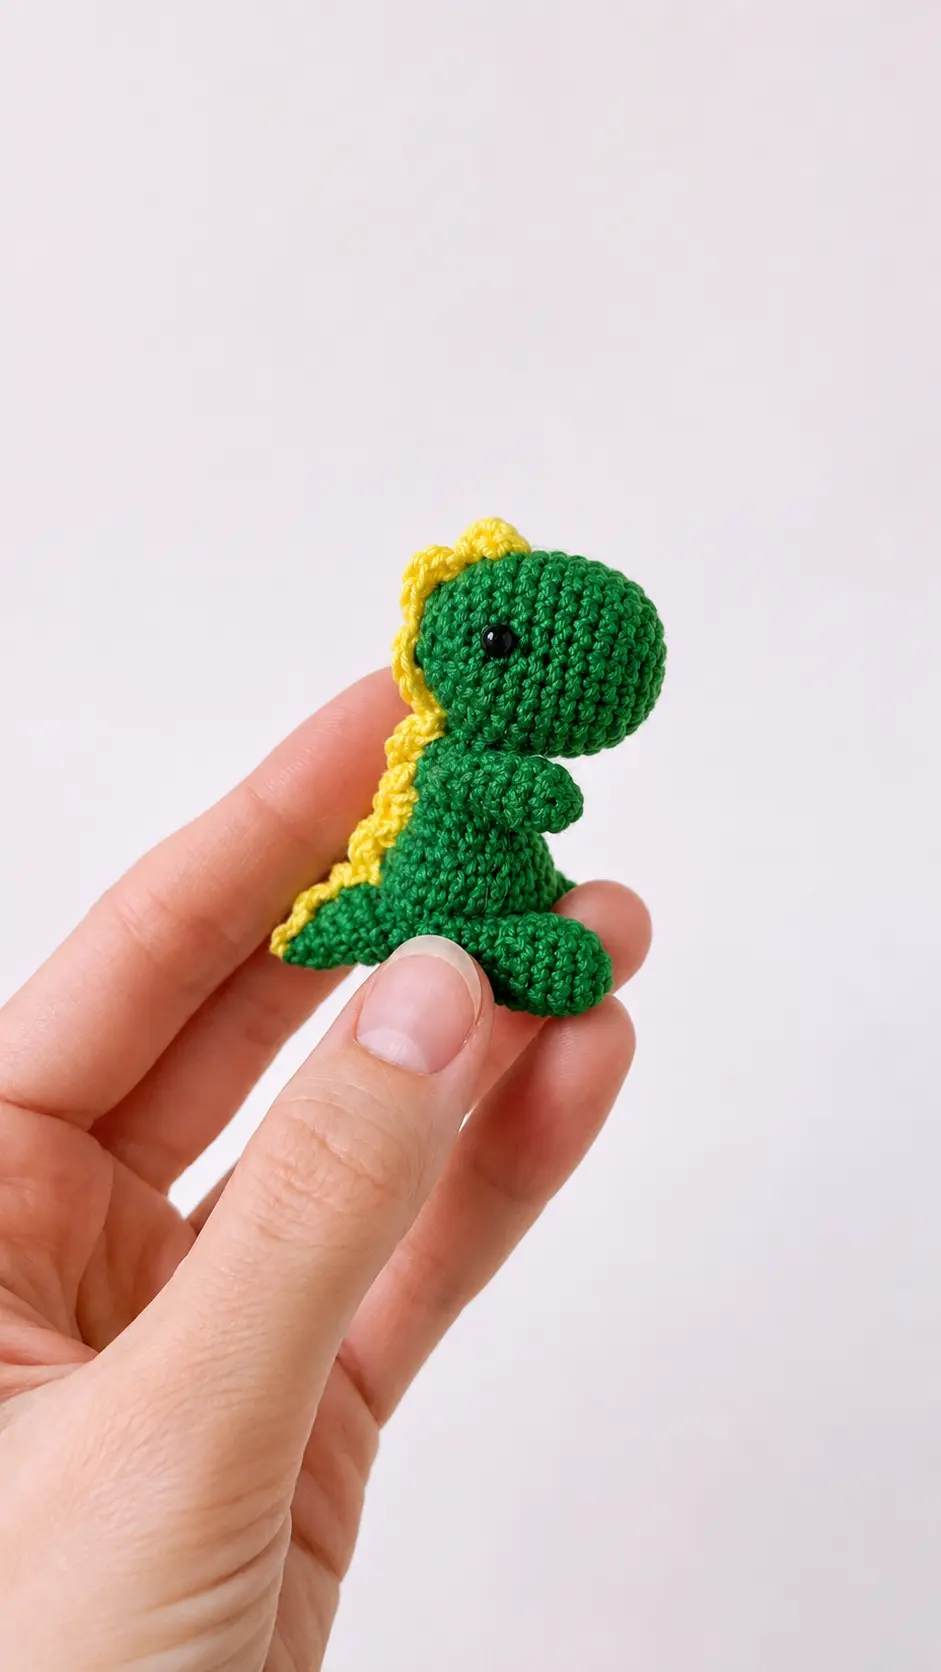
Size of the dino is about 6-7 cm.
Abbreviations
- MR = magic (amigurumi) ring
- ch = chain
- sc = single crochet
- hdc = half double crochet
- inc = increase
- dec = decrease
- slst = slip stitch
Pattern Instructions
Head
Work with green yarn
- 1 = 6 sc in MR
- 2 = 6 inc (12)
- 3 = (1 sc, inc)*6 (18)
- 4 = (2 sc, inc)*6 (24)
- 5-10 = 24 sc (6 rounds)
- 11 = (6 sc, dec)*3 (21)
- 12 = (5 sc, dec)*3 (18)
- 13 = (4 sc, dec)*3 (15)
- 14 = (3 sc, dec)*3 (12)
- 15 = 12 sc
Stuff. Then tighten the stitches using a needle, secure the thread, weave in the ends
Body
Work with green yarn
- 1 = 6 sc in MR
- 2 = 6 inc (12)
- 3 = (1 sc, inc)*6 (18)
- 4 = (2 sc, inc)*6 (24)
- 5-7 = 24 sc (3 rounds)
- 8 = 6 dec, (1 sc, dec)*4 (14)
- 9-11 = 14 sc (3 rounds)
- 12 = (5 sc, dec)*2 (12)
- 13 = 12 sc
Leave thread for sewing. Stuff
Legs (make 2)
Work with green yarn
- 1 = 6 sc in MR
- 2 = 6 inc (12)
- 3 = 12 sc
- 4-5 = 12 sc (2 rounds)
- 6 = (2 sc, dec)*3 (9)
- 7-10 = 9 sc (4 rounds)
Stuff. Tighten the opening, secure the thread and weave in the ends inside
Arms (make 2)
Work with green yarn
- 1 = 6 sc in MR
- 2 = (1 sc, inc)*3 (9)
- 3-4 = 9 sc (2 rounds)
- 5 = (1 sc, dec)*3 (6)
- 6-7 = 6 sc (2 rounds)
Stuff. Tighten the opening, secure the thread and weave in the ends inside
Tail
Work with green yarn
- 1 = 4 sc in MR
- 2 = (1 sc, inc)*2 (6)
- 3 = (2 sc, inc)*2 (8)
- 4 = (3 sc, inc)*2 (10)
- 5 = (4 sc, inc)*2 (12)
- 6 = (5 sc, inc)*2 (14), slst
Stuff a little. Leave a thread for sewing
Assembly
- 1 = glue the eyes between 11th and 12th rounds on sides of the head, embroider nostrils on 5th round, embroider a smile on 6-7 rounds (I embroidered a smile only on one side)
- 2 = sew the head to the body
- 3 = attach arms using thread attaching (or sew) 1 round below the seam between head and body
- 4 = attach legs using thread attaching (or sew) between 4th and 5th rounds of the body on the sides
- 5 = sew on the tail at the back of the toy approximately on 4-7 rounds (position it so the dino can rest on the tail while sitting)
- 6 = now you need to make the dino thorns with yarn of a different color (I have yellow): insert the hook under the central stitch of the 11th round of the head, make 2 ch, then work 3 hdc under the central stitch of the next (12th) round, make 2 ch, a slst under the center stitch of the next round. Again 2 ch, 3 hdc under the stitch of the next round, 2 ch, a slst under the stitch of the next round. Thus, continue over the head, then move on to the body. When you reach the tail, the scheme changes slightly: * make 3 ch, skip one round, a slst * – so repeat 3 times altogether to the tip of the tail. Cut the thread, secure it, weave in the ends
Tips for Success
- Use precise tension for fine cotton: Working with 100% cotton thread and a 1.5 mm hook requires consistent tension so the stitches stay tight and neat.
- Stuff firm for good posture: Make sure to stuff the head and body solidly so the toy maintains its upright shape after assembly.
- Position the tail for balance: When attaching the tail on rounds 4 through 7 of the body, test sitting the toy down first so the tail acts as a third leg for tripod stability.
- Try thread jointing for movable limbs: Using thread attachment for the arms and legs allows them to move gently up and down, giving your project extra character.
- Keep thorn stitches aligned: Take your time locating the exact center stitch down the spine when making the yellow thorns so they run straight down the middle of the back.
Frequently Asked Questions
- Can I make this project using standard worsted yarn?Yes, you can use medium worsted weight yarn with a matching larger hook, like a 3.5 mm hook. Your finished dinosaur will simply turn out larger.
- What is thread attaching for the limbs?Thread attaching uses a needle and durable thread passed through the body to hold both limbs on either side, allowing them to rotate instead of being sewn flat.
- How do I secure the 3 mm plastic eyes safely?Apply a tiny drop of craft glue or fabric glue to the pin of each plastic eye before pushing them into place between rounds 11 and 12.
- What yarn weight works best for this tiny size?Fine fingering weight cotton or crochet thread (240m per 50g) with a 1.5 mm hook works best to achieve the 6 to 7 cm finished size.
- Do I need to stuff the tail completely full?Stuffing the tail lightly works best so it holds its conical shape without turning into a heavy ball that unbalances the toy.
Conclusion
I hope you enjoy bringing this adorable little project to life at your crafting table. It is such a delightful build that brings instant joy to anyone who sees it. Have fun stitching up your Free Amigurumi Pattern, and happy crocheting!


Leave a Comment