

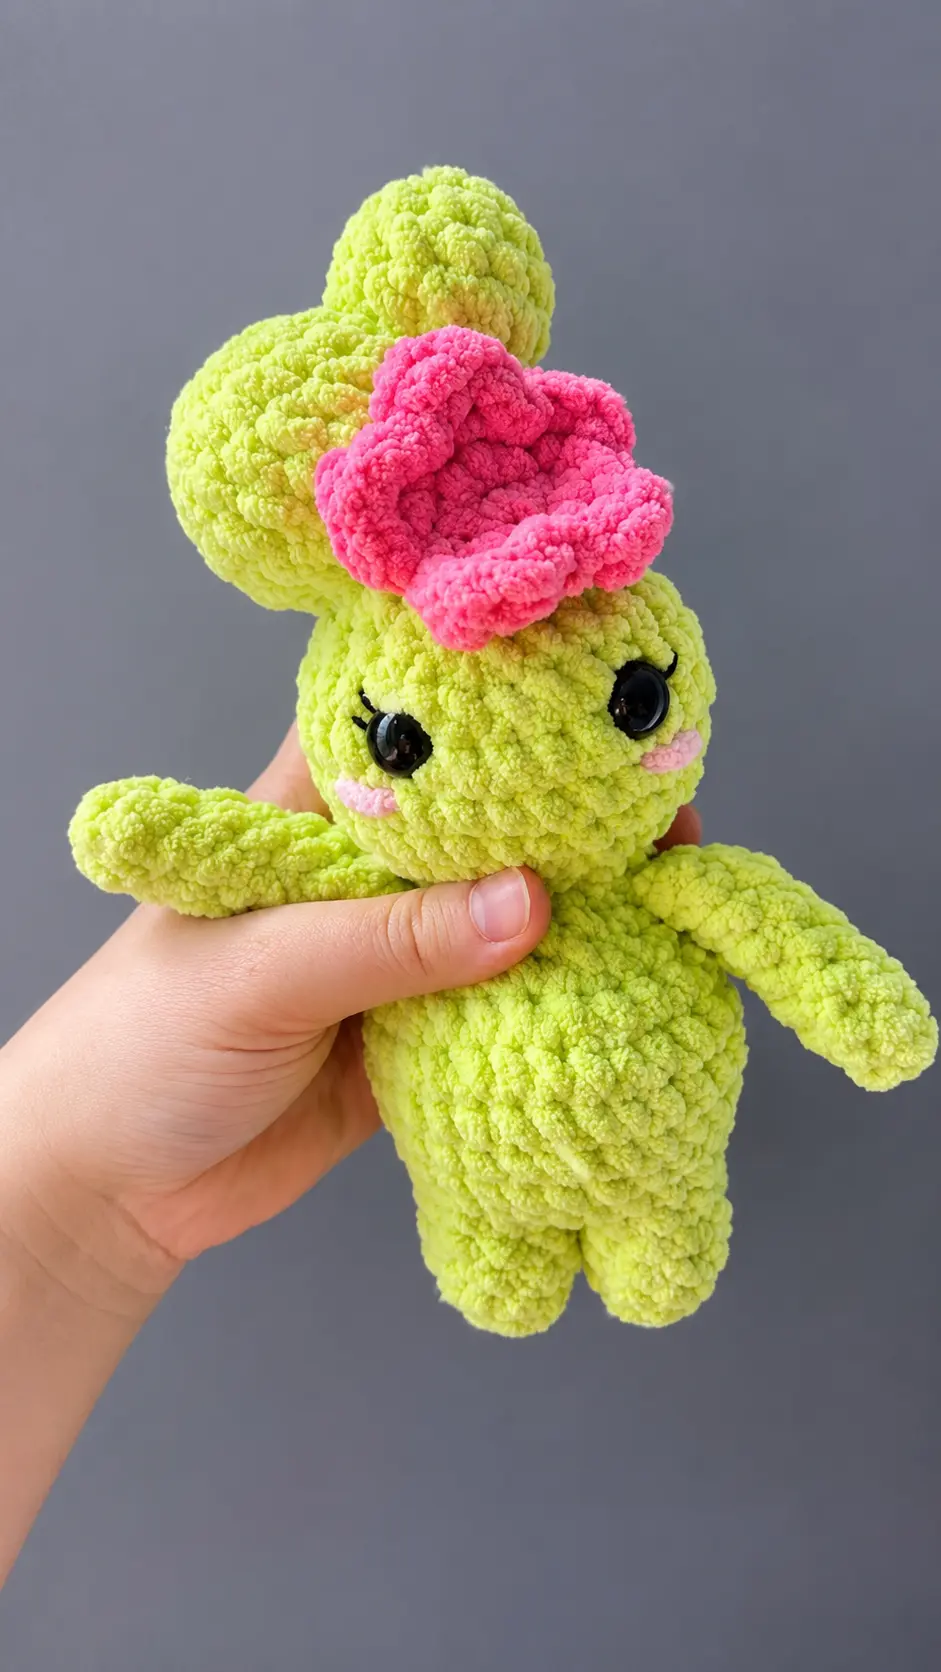
Last Wednesday, I met a friend for lunch at a little café downtown. On every table, they had tiny potted succulents and cacti instead of flower arrangements. I kept looking at the cutest little cactus by our table, and my friend laughed because she caught me turning it around to see it from every angle. Before we left, she said, “I bet you could crochet one of those.”
She was right. As soon as I got home, I looked through my yarn stash for the perfect shade of green. I found a soft skein of plush blanket yarn that I’d been saving, made myself a cup of coffee, and settled into my favorite chair. Instead of making a real cactus that I’d probably forget to water, I decided to crochet one that would stay bright and cheerful all year long. A few hours later, this sweet little cactus doll was sitting on my shelf, and it looked right at home.
If you enjoy working with soft plush yarn, you’re going to love this Free Amigurumi Pattern Miss Cactus Plush Doll. It’s a quick, cozy project that’s perfect for brightening up a desk, bookshelf, or windowsill. Whether you’re making it as a thoughtful handmade gift or adding another adorable plush to your collection, this little cactus is sure to make you smile. Grab your favorite hook, choose a soft green yarn, and let’s crochet this charming little friend together.
Materials Needed
- Yarn (2 colours)
- Crochet Hook
- Polyfil Stuffing
- Scissors
- Yarn Needle
- Stitch Marker
- Large Needles/Knitting Needles (optional)
Materials Used
- Berant Blanket Yarn (size 6)
- main colour – body and stems
- flower colour
- Size 6 mm (J) Crochet Hook
Finished Size
Size will vary based on yarn weight, hook size, and individual tension.
Abbreviations
- Magic Ring/Circle – (MR)
- Single Crochet – (SC)
- Half Double Crochet (HDC)
- Double Crochet – (DC)
- Slipstitch – (SLST)
- Increase (INC)
- Invisible Decrease – (DEC)
- ()- Repeat Instructions
- []-Stitch Count
Pattern Instructions
Start the body of the Potted Friends Pattern in the main colour you would prefer. Continue to row 24, fasten off, close opening, and weave in end. Continue with stems.
Note: Do not sew openings closed when finishing stems.
Large Stem
using main colour
1-MR 8 SC [8] 2-INC around [16] 3-(SC 7, INC) x 2 [18] 4-5 (2 rounds) – SC around [18] 6-(SC 7, DEC) x 2 [16] 7-DEC around [8]
Fasten off and leave a long tail for sewing. Stuff.
Small Stem
using main colour
1-MR 6 SC [6] 2- INC around [12] 3-4 (2 rounds) – SC around [12] 5 – DEC around [6]
Fasten off and leave a long tail for sewing. Stuff.
Flower
using flower colour
1-MR 10 SC [10] 2 – (In first stitch HDC, DC, HDC, and next stitch SLST) x 5 [20]
Fasten off and leave a long tail for sewing.
Assembly
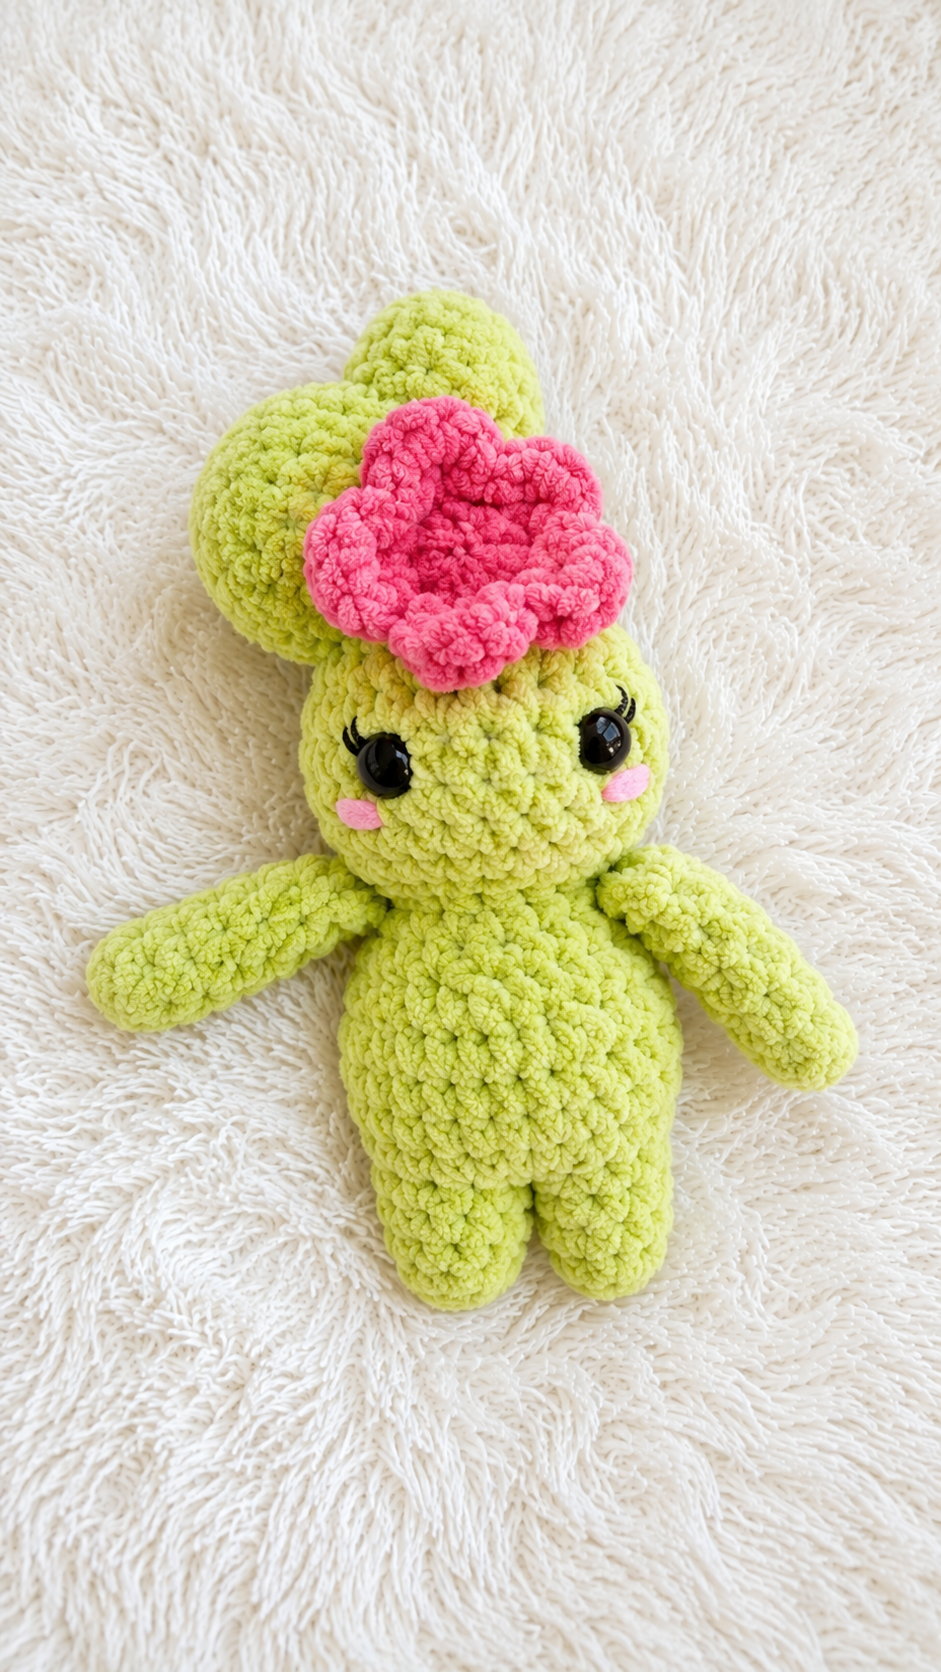
Start by sewing the small stem onto the large stem. The top should be between rounds 2/3 and bottom between rounds 5/6.
We can now sew the large stem to the head, making sure the small piece on top is inward towards the centre of the head. Top of large stem should be between rounds 24/23 and bottom between rounds 22/21.
Now to add the flower, which is placed in the middle of head, below the large stem.
Tips for Success
- Use long straight needles or knitting needles to pin the stems in place on the head before sewing, as super bulky yarn can shift easily during assembly.
- Keep your tension even when making the flower petals so that all five petals flare out uniformly.
- Stuff the stems firmly with fiberfill to make sure they hold their upright shape and do not sag once attached to the head.
- Always leave a generous yarn tail when fastening off your pieces to ensure you have plenty of length to sew them down securely.
- Place a stitch marker in the first stitch of every round to easily keep track of your rows when working in continuous spirals.
- Use an invisible decrease technique when working round 7 of the large stem and round 5 of the small stem to keep the shaping smooth and free of large gaps.
Frequently Asked Questions
What type of yarn works best for this project?
Super bulky size 6 blanket yarn works wonderfully to give this doll a plush, soft feel, but you can also use worsted weight acrylic or cotton if you prefer a smaller plushie.
Do I need to close the open ends of the stems before sewing?
No, leave the open ends of the stems open after stuffing so you can attach them directly onto the main head piece for a flat, sturdy join.
How do I keep the stem pieces positioned correctly while sewing?
Inserting knitting needles or long pins through the stems into the head holds them securely in position so they do not tilt while you stitch them down.
Can I use a different hook size for this pattern?
Yes, but be sure to choose a hook size that creates tight stitches with your chosen yarn weight so the stuffing does not poke through.
Where should the small stem be placed on the large stem?
Attach the top of the small stem between rounds 2 and 3 of the large stem, and secure the bottom between rounds 5 and 6.
Conclusion
I hope you have so much fun making this adorable plushie to add a touch of handmade greenery to your home! Crocheting small, playful items is such a relaxing way to spend an afternoon, and this project brings a smile to everyone who sees it. Keep this Free Amigurumi Pattern Miss Cactus Plush Doll in your favorites for when you need a fun, quick gift idea. Grab your hook, pick out your favorite bright yarn colors, and enjoy every stitch!


Leave a Comment