

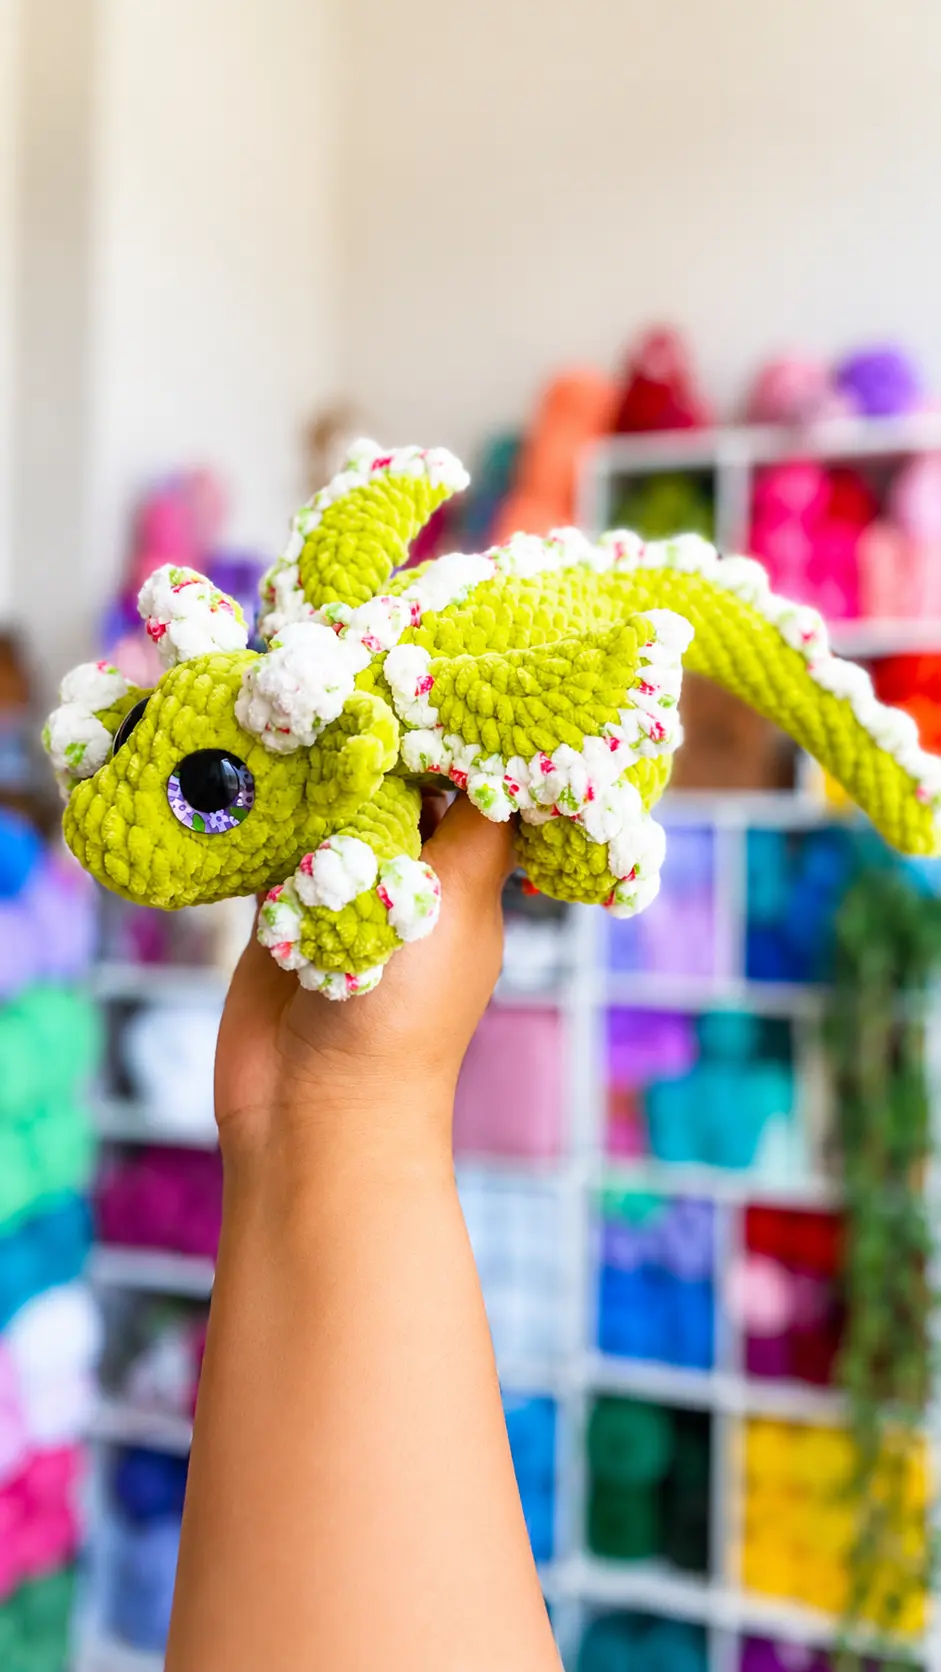
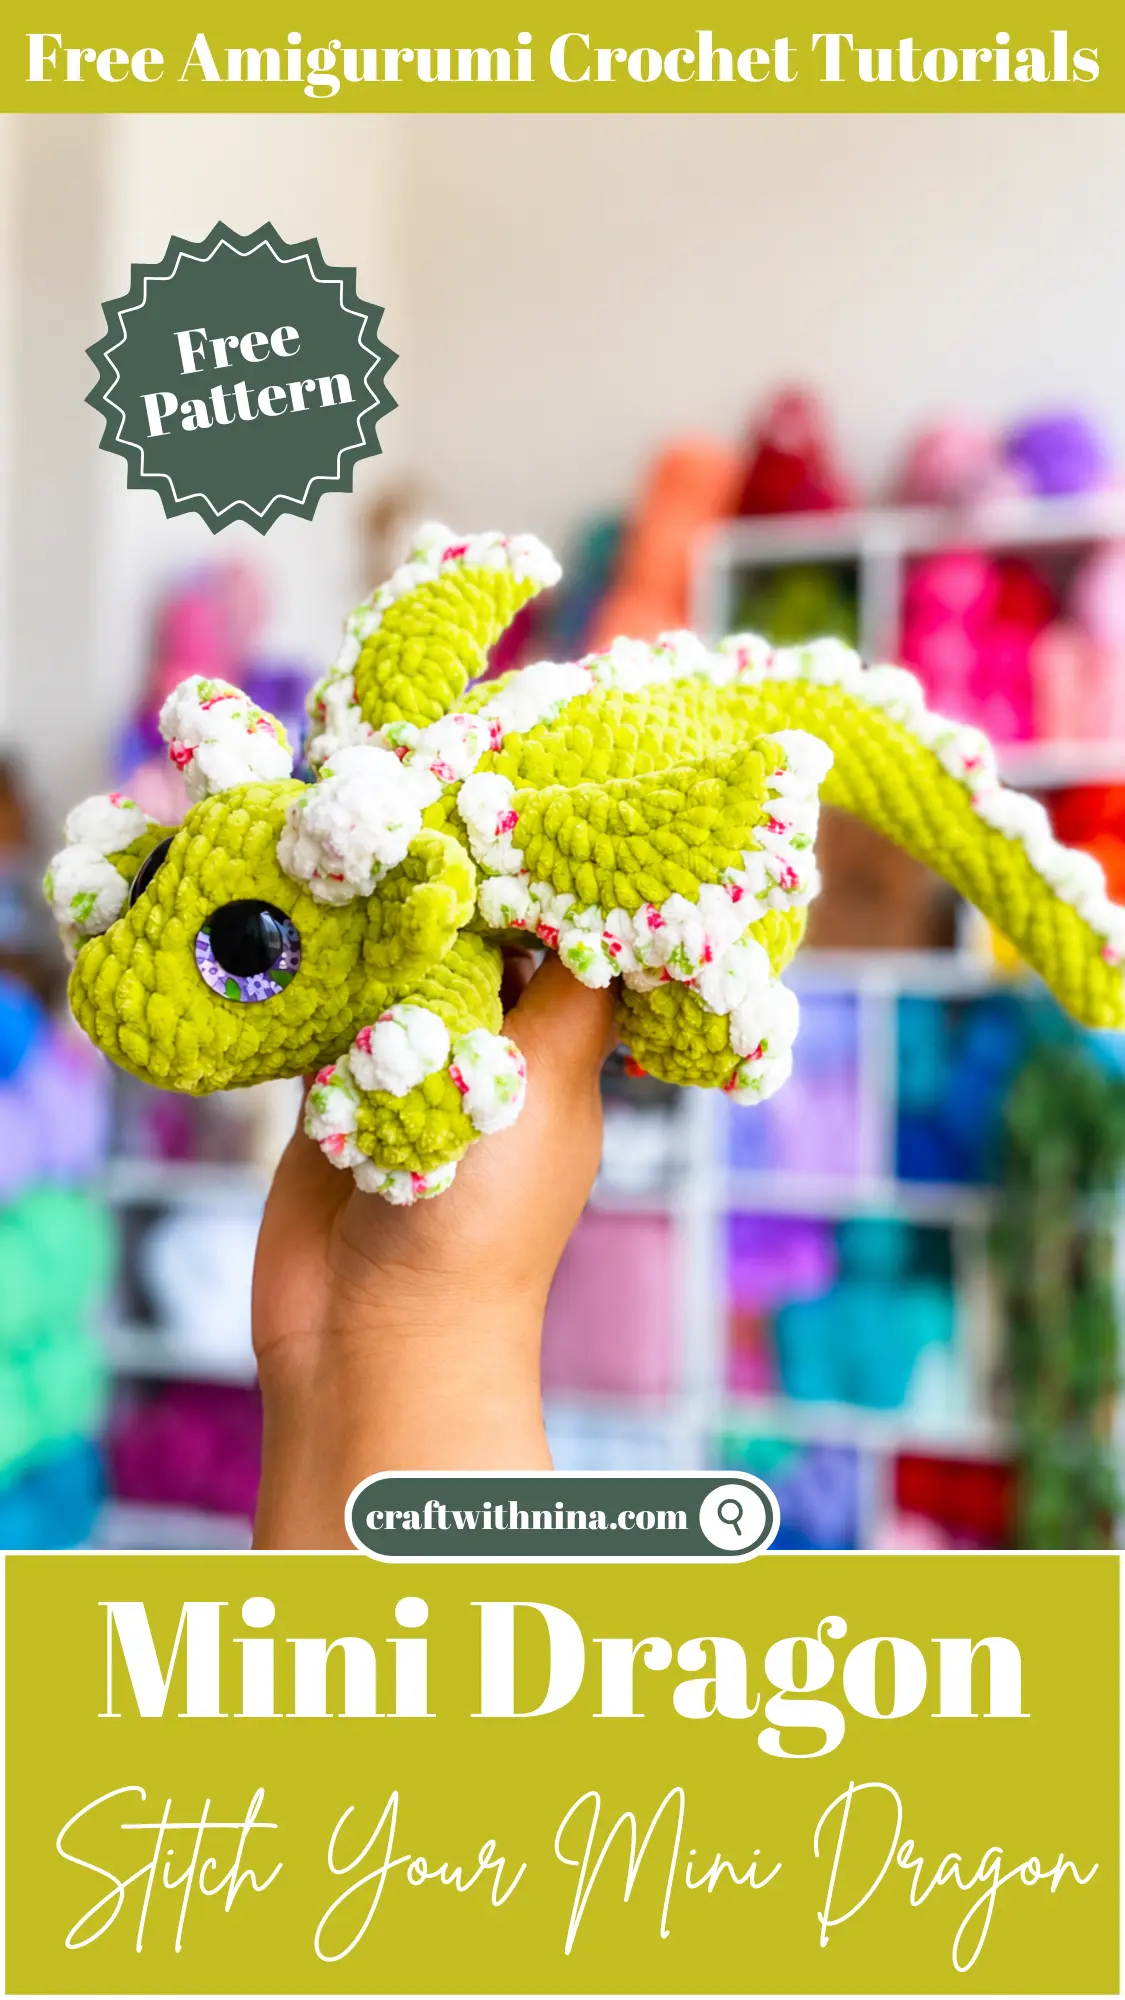
A few weekends ago, I took my granddaughter to the library for one of their children’s story hours. After the books were finished, the librarian brought out a basket of stuffed animals and little fantasy creatures for the kids to play with. My granddaughter spent almost the whole time carrying around a tiny dragon, and she kept asking if I could crochet one for her. I smiled and told her I’d see what I could do.
When we got home, she ran off to play while I made myself a cup of tea and headed to my craft room. I pulled out a basket of leftover yarn in bright, cheerful colors and started experimenting. One stitch led to another, and before long, a cute little fantasy creature was smiling back at me from my work table. I couldn’t wait to show it to her the next day.
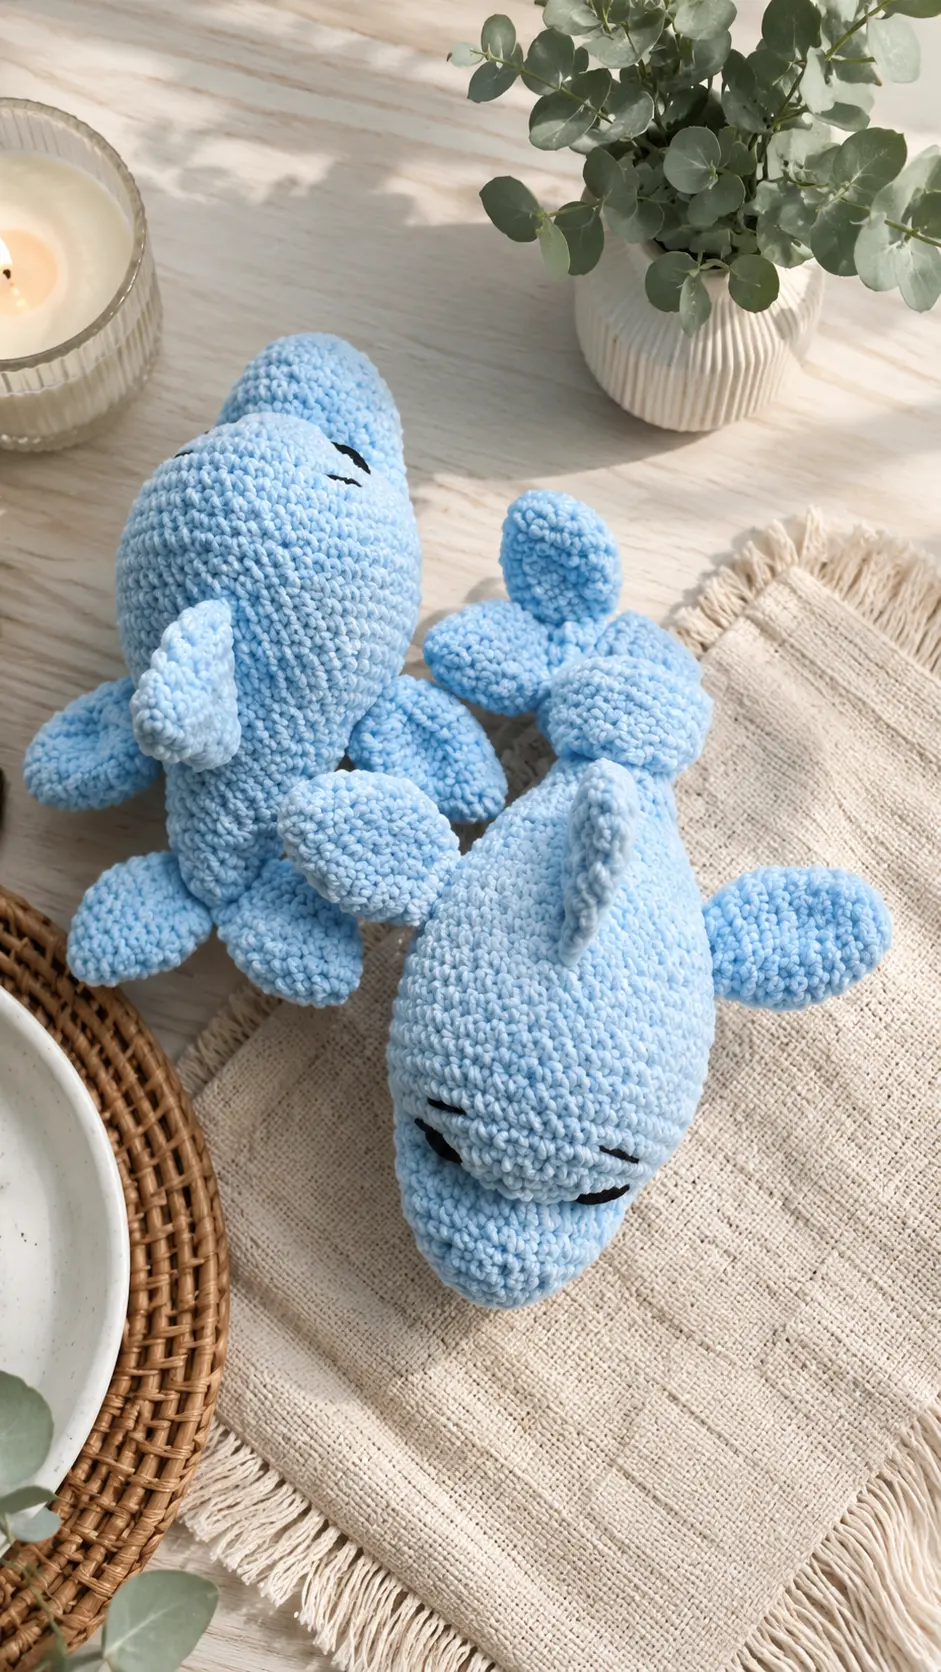
If you’ve been looking for a charming, colorful amigurumi project, I think you’re going to enjoy this one. It’s a fun pattern that lets you play with your favorite yarn shades while creating an adorable fantasy friend. Whether you’re making it for a child, a fellow crochet lover, or simply because it makes you smile, this project is a rewarding one from beginning to end. Grab your favorite hook, get comfortable, and let’s start stitching together.
Materials Needed
- Yarn of your choice (Size 6 super bulky yarn used in sample)
- Crochet hook: 5.5mm / 6mm
- Safety eyes: 14mm
- Fiber filling
- Stitch marker
- Scissors
- Yarn needle
Finished Size
Size will vary depending on yarn weight and hook size used.
Abbreviations
- MR – Magic ring
- SC – Single crochet
- DC – Double crochet
- DEC – Decrease (inv)
- INC – Increase
- FO – Fasten off
- FLO – Front loops only
- BLO – Back loops only
- SLST – Slip stitch
- CH – Chain
- STS – Stitches
- BO – Bobble stitch
- () – Number of stitches at the end of each round
Pattern Instructions
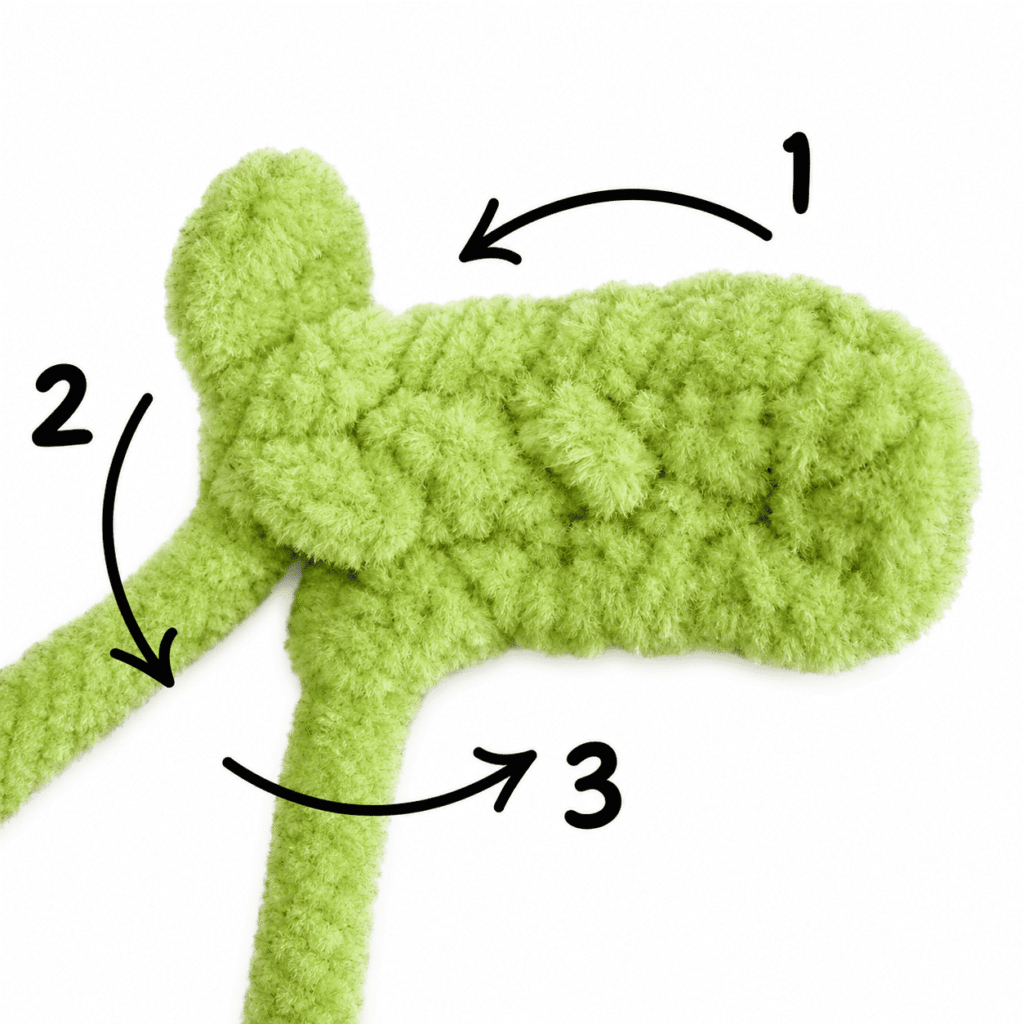
Head – Body – Tail
Use second color for arms, legs and horns. Bo for horns: 3dc, Bo for arms and legs: 5dc.
You may need to use a stitch marker to keep a track number of your stitches.
Start with body color, make a slipknot,
- Chain 4, turn, starting in the second chain from your hook, inc, sc, inc, continue on the other side of the chain, 3sc (8)
- 8sc around (8)
- 8inc (16)
- 16sc around (16)
- 3sc, Bo, 3sc, Bo, 8sc (16)
Insert safety eyes between rounds 3-4, 4 sts apart.
Start stuffing, continue as you go.
- (2sc, dec) x 4 (12)
- 2sc, 3dec, 4sc (9)
- 2sc, 3inc, 4sc (12)
- (2sc, inc) x 4 (16)
- 13sc, Bo, 2sc (16)
- Bo, 15sc (16) 12-14. 16sc around for 3 rounds (16)
- 14sc, Bo, sc (16)
- Sc, Bo, 14sc (16)
- (2sc, dec) x 4 (12)
- (4sc, dec) x 2 (10) 19-21. 10sc around for 3 rounds (10)
Stuff the tail loosely so it can bend easily.
- 6sc, dec, 2sc (9)
- 9sc around (9)
- 7sc, dec (8)
- 8sc around (8)
- 6sc, dec (7)
- 7 sc around (7)
- 5sc, dec (6) 29-32. 6 sc around for 4 rounds (6)
- 4sc, dec (5) 34-38. 5 sc around for 6 rounds (5)
Fasten off. Close the hole.
Ears (Make 2)
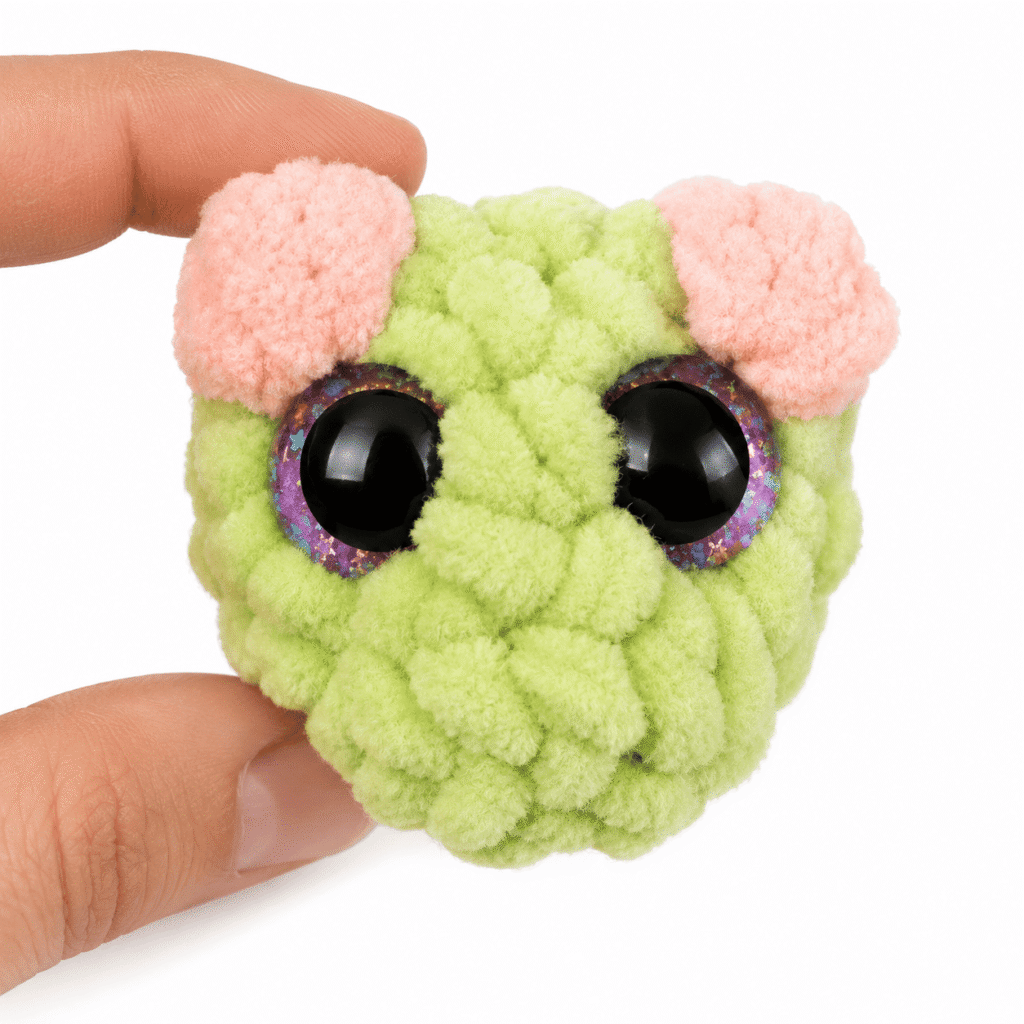
Use body color, make a magic ring,
- 2sc, dc, chain1, dc, 2sc into MR (6sc)
Slst into next stitch. Fasten off, leave a tail for sewing.
Sew under the horns, between rounds 5-6.
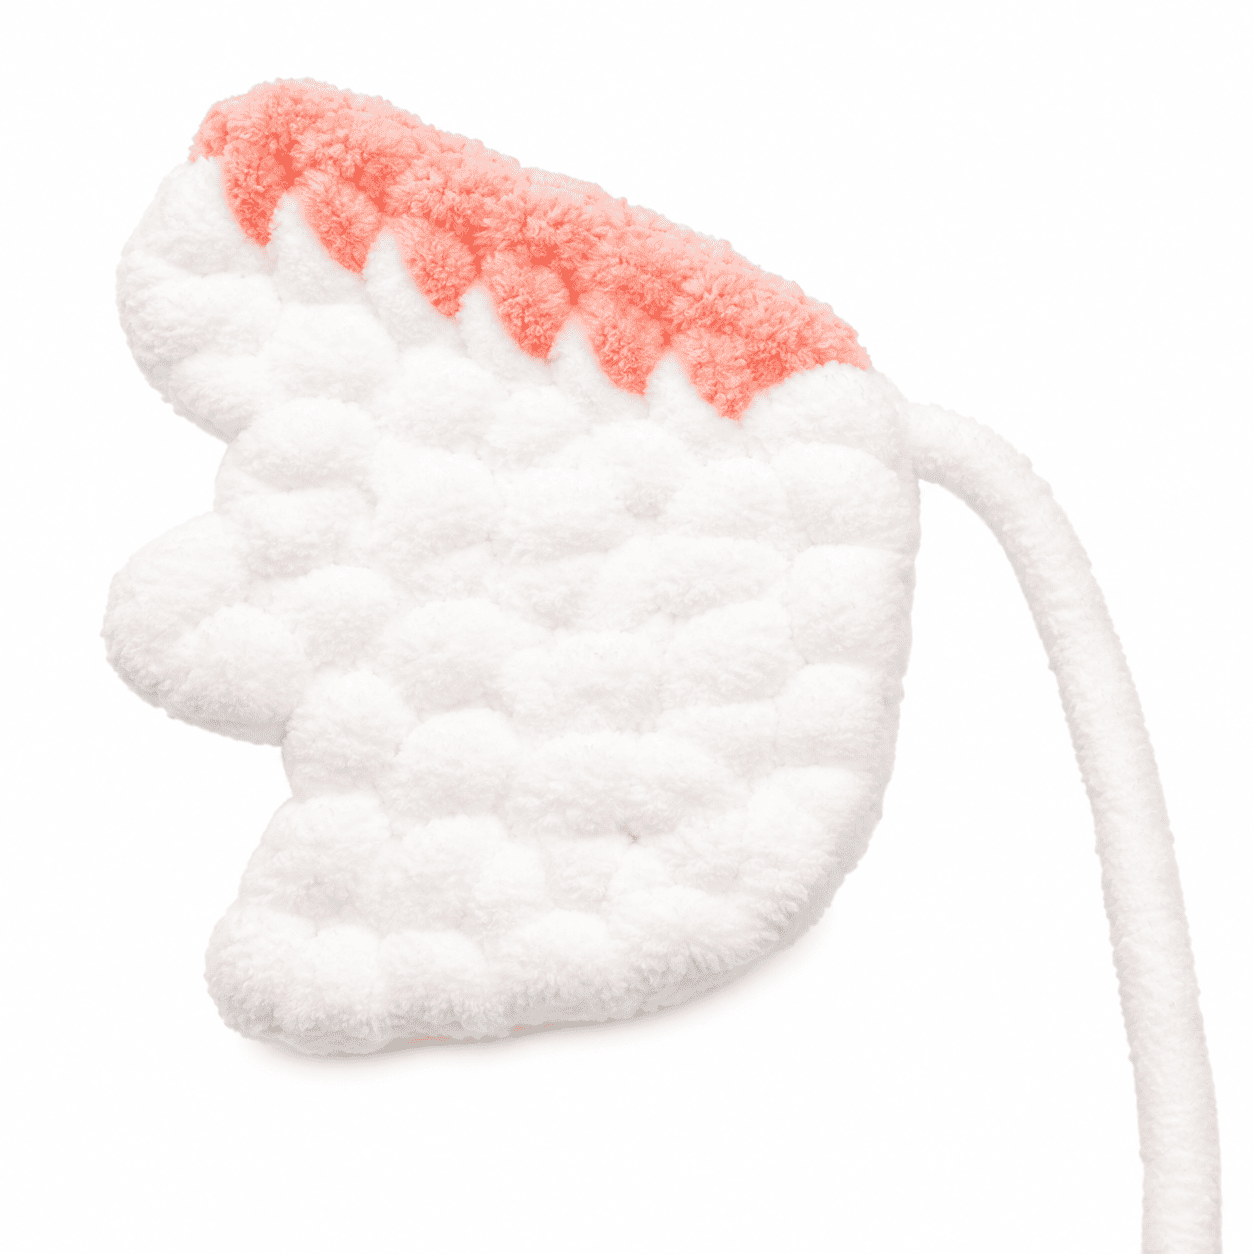
Wings (Make 2)
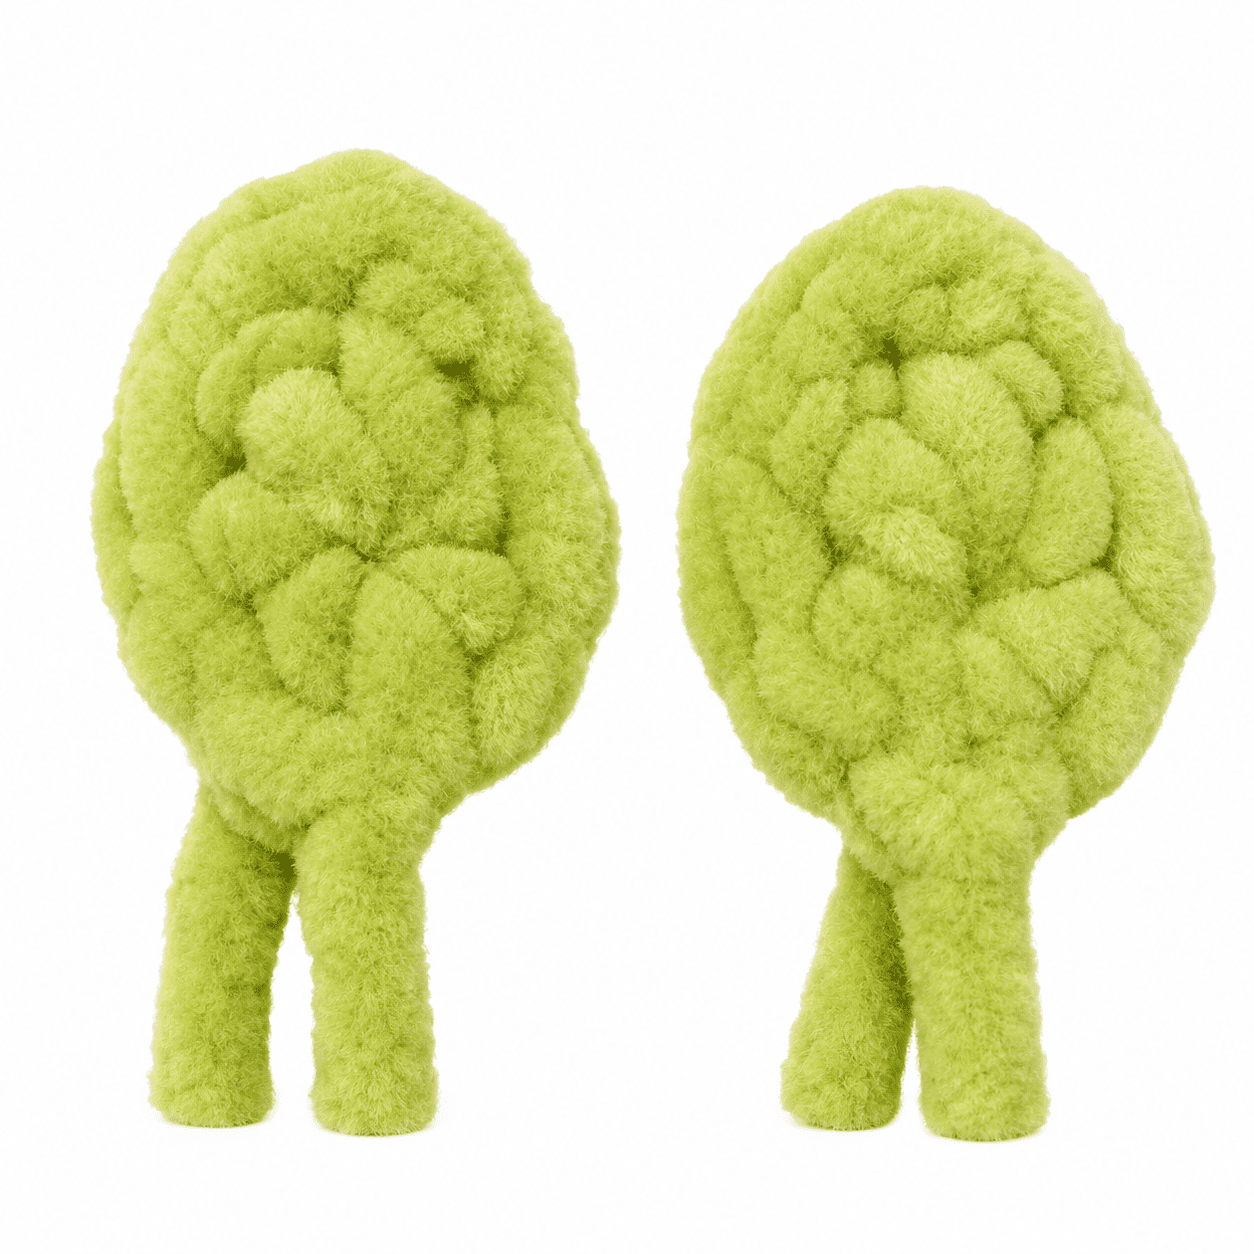
Work with turning rows not continuous rounds. Use wing color, make a slipknot,
- Chain 8, tw
- 7sc, ch 1, tw
- 5sc, leave last 2 stitches unworked, ch 2, tw
- 6sc, ch 1, tw
- 4sc, leave last 2 stitches unworked, ch 2, tw
- 5sc, continue working towards the starting tail, make sc into every hole you find, about 5 stitches. Continue working on the other side of your work, change color, make 6sc, slst into next stitch.
Fasten off, leave a tail for sewing. Sew between rounds 10-14, 4 sts apart.
Spikes
Insert your hook between last two rounds of the tail, yarn over, pull through, ch1. Work from the tail to the head;
2sc, [(hdc, chain2, hdc) into same stitch, 3sc] x 7, (hdc, ch2, hdc) into next stitch, fo, weave in the ends.
Congrats! You finished your plushie I hope you enjoyed it. If you post your plushie, please don’t forget to tag me @drchoco_crochet
Ps: You can find a more detailed version of this pattern, including pictures, on my Etsy
Tips for Success
- Use a Stitch Marker: Because this pattern is worked in continuous rounds, placing a stitch marker in the first stitch of each round helps you keep track of your progress without losing your spot.
- Mind Your Bobble Stitches: Pay close attention to the stitch key for bobbles. Remember to use a 3-DC bobble for the horns and a 5-DC bobble for the arms and legs to get the right shape and size.
- Stuff Lightly Towards the End: Fill the head and main body firmly, but stuff the long tail very loosely. This allows the tail to remain flexible and poseable.
- Count Stitches on Wings carefully: The wings are worked in flat turning rows rather than rounds. Double check that you leave the correct unworked stitches on rows 3 and 5 to create that classic winged shape.
- Secure Safety Eyes Early: Make sure to snap your safety eyes securely in place between rounds 3 and 4 before you narrow down the neck area and stuff the head completely.
Frequently Asked Questions
Can I use a different yarn weight for this pattern?
Yes, you can use any yarn weight you prefer. Just remember to adjust your crochet hook size accordingly to match your yarn so that your stitches stay tight enough to hold fiberfill.
What size safety eyes should I use if I change yarn?
If you stick with super bulky yarn, 14mm safety eyes work great. If you scale down to worsted weight yarn, consider dropping down to 8mm or 10mm safety eyes so they remain proportional to the face.
Is this pattern suitable for beginners?
This pattern is rated as intermediate because it uses bobble stitches, row shaping for the wings, and continuous rounds. However, an ambitious beginner familiar with basic stitches can certainly give it a try!
How do I attach the ears properly?
The ears are sewn directly beneath the horns, positioned neatly between rounds 5 and 6 of the head using the long yarn tail left after fastening off.
How are the back spikes attached?
The spikes are crocheted directly onto the body. You insert your hook between the last two rounds of the tail and work forward along the spine towards the head, working the spike sequence directly into the body surface.
Conclusion
Working up this free amigurumi pattern is such a satisfying way to spend an afternoon. Whether you stick with cozy plush chenille or go with a smooth cotton yarn, making your own little dragon allows for endless color combinations. I hope you have as much fun stitching yours as I did mine. Happy crocheting, and enjoy bringing your new plush friend to life!


Leave a Comment