

Last Saturday, I met one of my closest friends for coffee, and somehow our conversation drifted from family and work to all the handmade decorations we loved as kids. She mentioned that Halloween was her favorite holiday because she preferred cute decorations over the spooky ones. On my way home, I couldn’t stop thinking about that conversation.
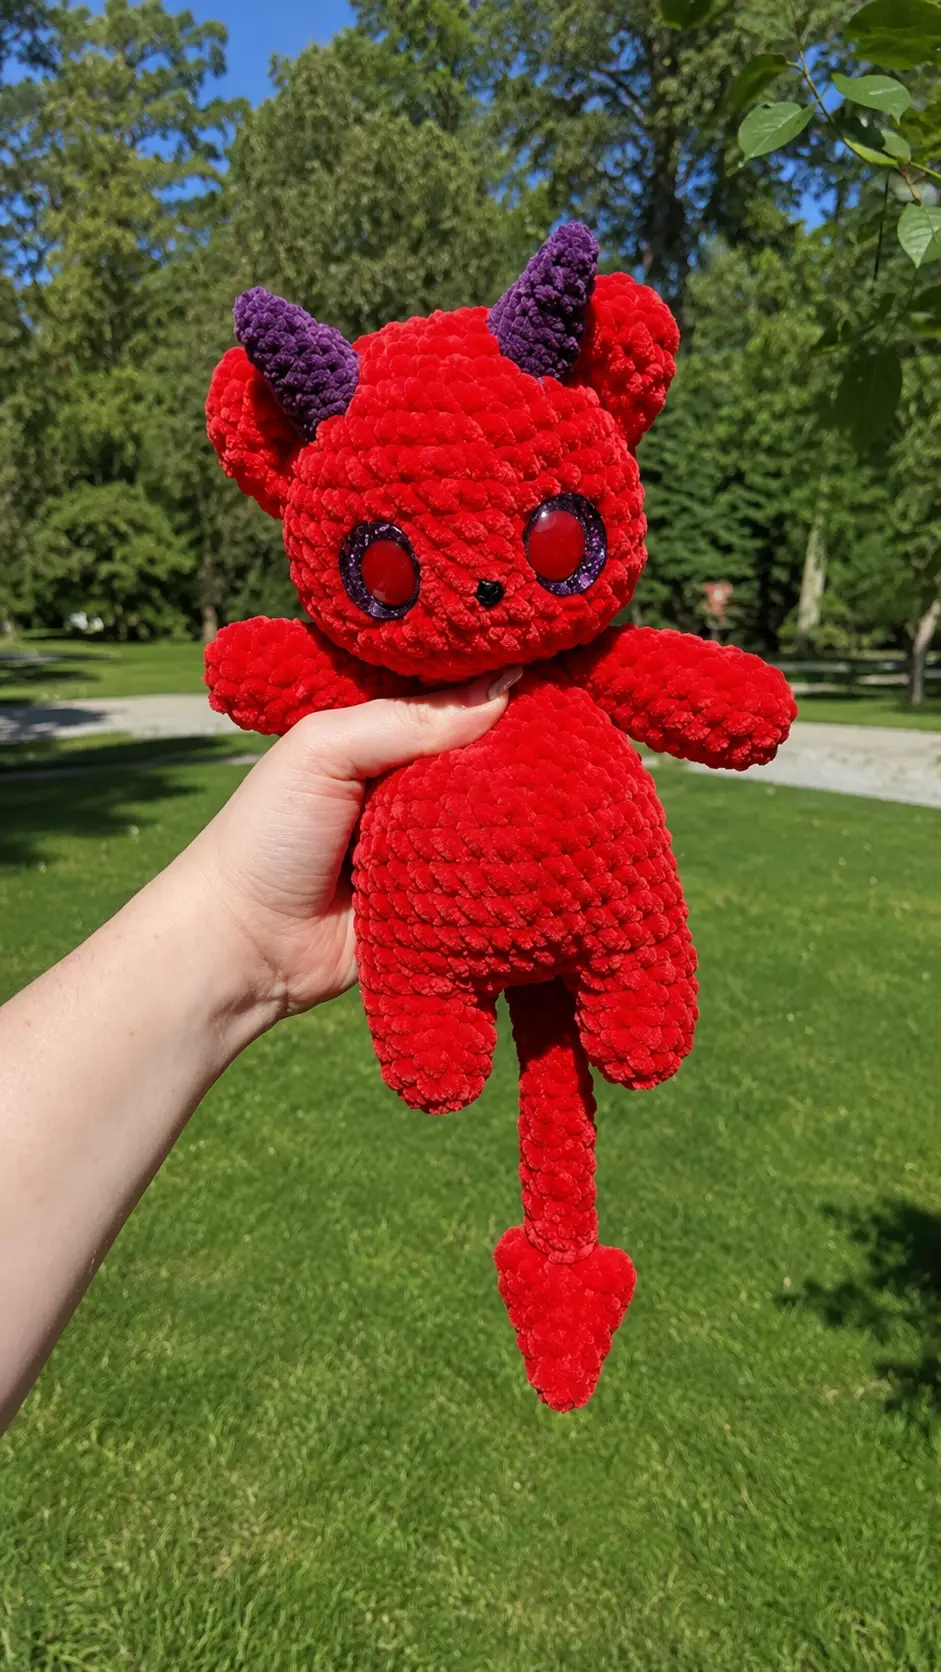
That evening, I looked through my yarn stash for colors that felt fun instead of scary. I found a bright red skein and a little bit of purple chenille yarn that were perfect together. I curled up on the sofa with a blanket, turned on one of my favorite old TV shows, and started crocheting. As the stitches came together, a tiny bear with little horns appeared. I added a pair of optional wings just for fun, and by the time my show ended, I had the cutest little devil bear sitting beside me.
This Free Amigurumi Pattern Little Devil Bear Plushie is inspired by that cozy evening. It is soft, playful, and surprisingly easy to put together, making it a wonderful project for a relaxing weekend. Whether you’re crocheting it as a unique handmade gift, a cute Halloween decoration, or simply because you love whimsical plushies, this little bear is sure to steal your heart. Grab your red and purple yarn, settle into your favorite chair, and let’s crochet this adorable plush together.
Materials Needed
- Red chenille yarn size 6
- Purple Chenille size 5 (used Sweet snuggles skinny)
- 5.5 mm hook
- 4mm hook
- tapestry needle
- stitch marker
- polyfil
- 25 mm safety eyes
- 10 mm safety nose or safety eye (I used an eye as my nose)
Finished Size
Finished size will vary depending on your individual tension and exact yarn weight. Using size 6 super bulky chenille yarn creates a soft, plush, huggable bear.
Gauge
Gauge is not critical for this pattern. Ensure your stitches are tight enough so that the polyfil stuffing does not show through your single crochet stitches.
Abbreviations
- sc – single crochet
- ch – chain
- mr – magic ring
- rds – rounds
- R# – round number
- inc – increase
- dec – decrease
- Fo – fasten off
- hdc – half double crochet
- dc – double crochet
- MC – Main color
- CC – Contrast color
- tw – turn work
Pattern Instructions
Arms x2
Using 5.5 mm hook and MC
R1: ch 5 and sc in the 2nd ch from hook, sc in the next 3 sts and sc 4 on the opposite side (8)
R2: (sc 3, inc)x2 (10)
R3-10: sc around (10) {8 rds}
I stuffed my arm lightly but some prefer the unstuffed look so stuff on your preference:) Fo and leave a long tail for sewing!
Legs x2
using 5.5 mm hook and MC
R1: sc 5 in Mr (5)
R2: inc x5 (10)
R3-5: sc around (10) {3 rds}
Fo first leg and leave a long tail for sewing any gaps! Do not Fo the second leg, ch 4 instead!
Body
R6: after chaining 4, sc on the first leg to attach! Make 9 more sc on the first leg. Sc 4 on chs, sc 10 on second leg, sc in each of the next 4 chs (28) sew hole between legs!
R7: sc 8, (sc, inc)x4, sc 12 (32) *increases are the belly!! stuff legs (if you are left handed you may want to switch this round around!)
R8-12: sc around (32) {5 rds}
R13: (sc 6, dec)x4 (28)
R14: (sc 5, dec)x4 (24)
R15: sc around (24)
R16: (sc 4, dec)x4 (20)
R17-18: sc around (20) {2 rds} stuff body
R19: (sc 8, dec)x2 (18)
Finish stuffing. Fo and leave a long tail to sew the head to the body!
Head
Using 5.5mm hook and MC
R1: ch 7, sc in 2nd ch from hook and sc in the next 5 sts, sc 6 on the opposite side (12)
R2: (sc 1, inc)x6 (18)
R3: (inc, sc 2)x6 (24)
R4: (sc 3, inc)x6 (30)
R5: (inc, sc 4)x6 (36)
R6-12: sc around (36) {7 rds}
R13: (dec, sc 4)x6 (30)
R14: (sc 3, dec)x6 (24)
*start stuffing and add safety eyes between rds 11 and 12 7 sts apart, add safety nose between safety eyes! You can also put the nose one round down, whichever you prefer!! You can also embroider the nose!!
R15: (dec, sc 2)x6 (18)
fo and leave a short tail, stuff the rest of the way!
Ears x2
Using 5.5 mm hook and MC
R1: 6 sc in Mr
R2: inc (12)
R3-5: sc around (12) {3 rds}
Fo and leave a long tail for sewing!! don’t stuff
Tail
Using 5.5 mm hook and MC
R1: 6 sc in Mr
R2-18: sc around (6) {17 Rds}
Fo and leave a long tail for sewing!! don’t stuff
Point of tail
Using a 5.5 mm hook and MC
R1: 4 sc in Mr
R2: (sc, inc)x2 (6)
R3: (sc 2, inc)x2 (8)
R4: sc around (8)
R5: (sc 3, inc)x2 (10)
R6: (sc 4, inc)x2 (12)
R7: sc around (12)
Fo and leave a long tail for sewing!! don’t stuff
sew point of tail to Mr of tail
Wings x 2
Optional!!
Using 5.5 mm hook and second CC color (I used white)
R1: ch 13 and sc in the second ch from hook then sc in the last 11 sts ch 1 and tw (12)
R2: sc 9, sc 2 and tw (9)
R3: sc in the second ch from hook then sc in the last 9 sts, ch 1 and tw (10)
R4: sc 7, ch 2 and tw (7)
R4: sc in the second ch from hook then sc in the remaining 7 sts, ch 1 and tw (8)
R5: sc 5, ch 2 tw (5)
R6: sc in the second ch from hook then sc in the remaining 5 sts, ch 1 and tw (6)
do not fasten off instead ch 1 and rotate your work and make 3 dec across the side of your wing
Fo and leave a long tail for sewing!!
Horns x2
Using 4mm hook and weight 4 yarn
R1: sc 4 in Mr
R2: (sc, inc)x2 (6)
R3: (sc 2, inc)x2 (8)
R4: (sc 3, inc)x2 (10)
R5: (sc 4, inc)x2 (12)
fold and sc 4/5 sts across
Fo and leave a long tail for sewing!! don’t stuff
Assembly
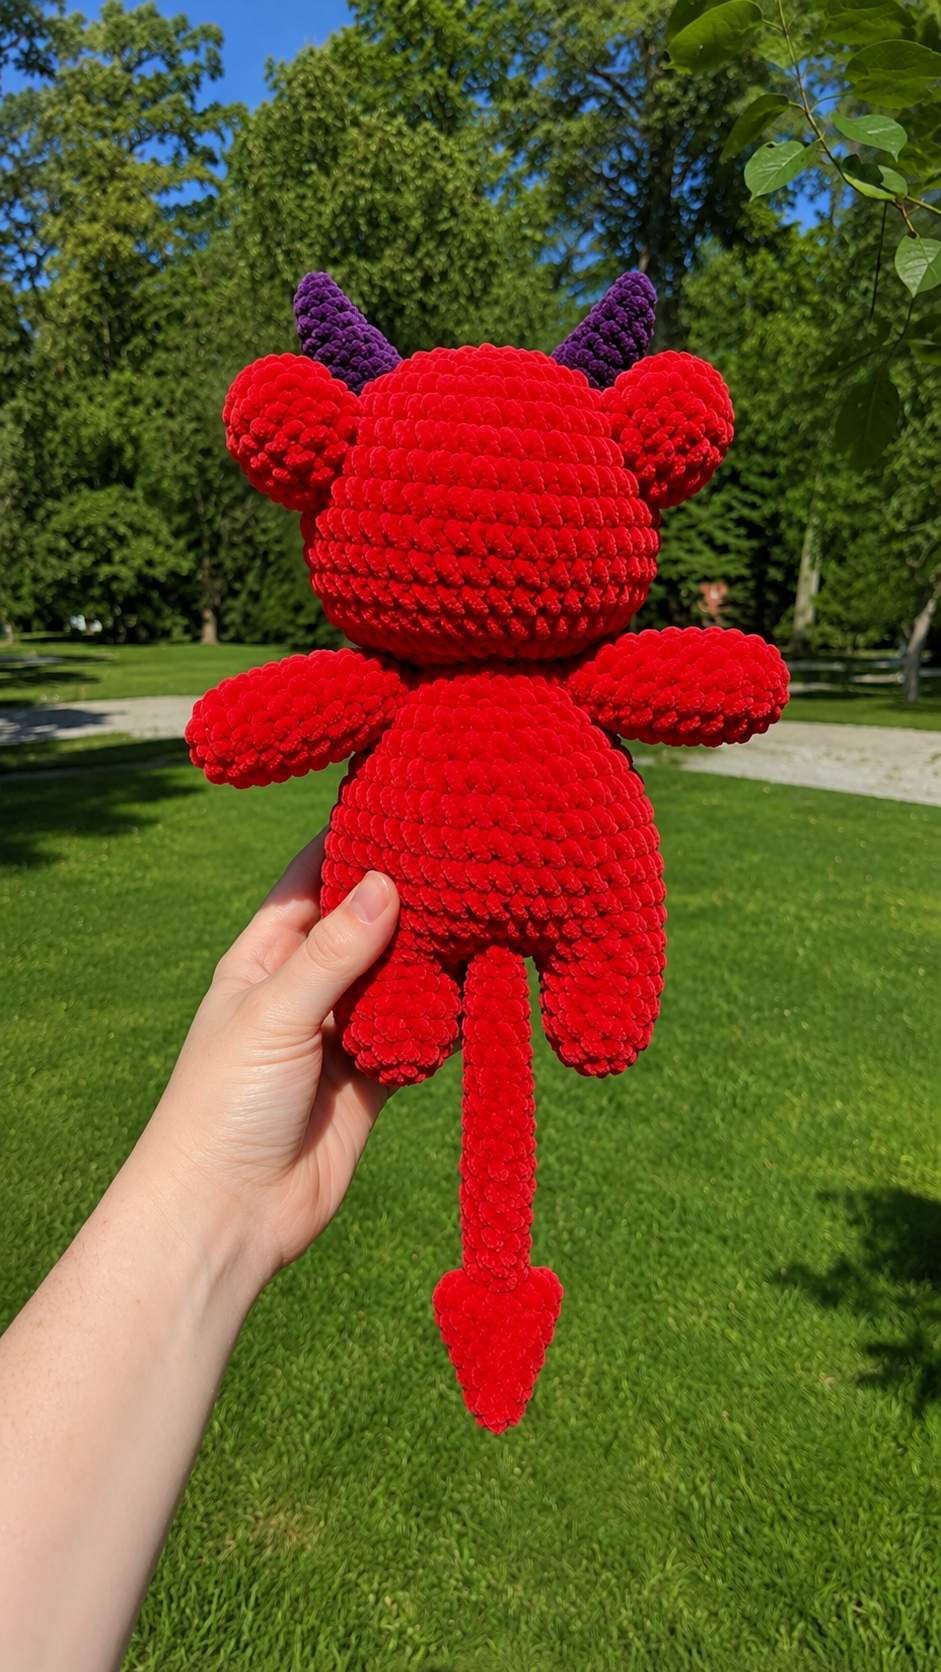
sew the arms onto either side of the body on row 19!
sew the head to the body!
sew the ears between rds 2-6 on head!
Sew horns on rds 1-2
sew the tail onto rows 8-9
sew point to end of tail
(optional) sew wings on rds 15-18
Tips for Success
- Use a Stitch Marker for Chenille Yarn: Plush chenille yarn has a soft texture that can make it tricky to see individual stitch loops. Marking the first stitch of every round helps keep your stitch counts on track.
- Close Leg Gaps with Yarn Tails: When joining the legs with chains, use the initial yarn tail from the first leg to stitch closed any small gap between the legs before stuffing.
- Pin Parts Before Sewing: Use straight sewing pins to secure the ears, horns, snout or nose, and tail to the main body prior to stitching. This allows you to check alignment and make adjustments easily.
- Stuff in Small Batches: Adding polyfil stuffing in small, firm handfuls helps prevent lumpy spots and gives your bear a smooth shape.
- Switch Hook Sizes for Horns: Pay close attention to hook sizes when moving to the horns, as using a smaller 4mm hook creates a tighter, firmer shape that holds its horn structure well without stuffing.
- Secure Safety Eyes Firmly: Make sure your 25 mm safety eye backings snap completely into place before you finish stuffing the head.
Frequently Asked Questions
What yarn works best for this plush bear?
Size 6 red chenille yarn works wonderfully for the main body to give it a thick, squishy plush texture. You can also use standard acrylic worsted yarn, though your finished plushie will turn out smaller.
Can I skip making the wings?
Yes, the wings are listed as an optional part of the pattern. The bear looks complete with or without them depending on your personal preference.
How do I attach the tail point to the tail stem?
The point of the tail is worked separately as a small cone shape. Once finished, line up the magic ring opening of the main tail tube with the bottom of the tail point and sew them together securely using your tapestry needle.
Why are different hook sizes needed in this pattern?
The main body parts use a 5.5 mm hook to keep the plush chenille yarn easy to work. A smaller 4mm hook is used for the horns to create tight, dense stitches so they stand upright on top of the head.
What can I use if I do not have a safety nose?
You can easily substitute a safety eye for the nose as mentioned in the pattern notes, or use black yarn to embroider a simple nose onto the head instead.
Conclusion
Creating this cheerful project is such a fun way to use up bright colors in your yarn collection. The combination of simple single crochet rounds and easy assembly makes it a joy to work on during a quiet evening at home. Be sure to save this Free Amigurumi Pattern Little Devil Bear Plushie to your crochet project board on Pinterest so you can return to it whenever you need a fun project. Happy crocheting, and enjoy sharing your newly finished friend!


Leave a Comment