

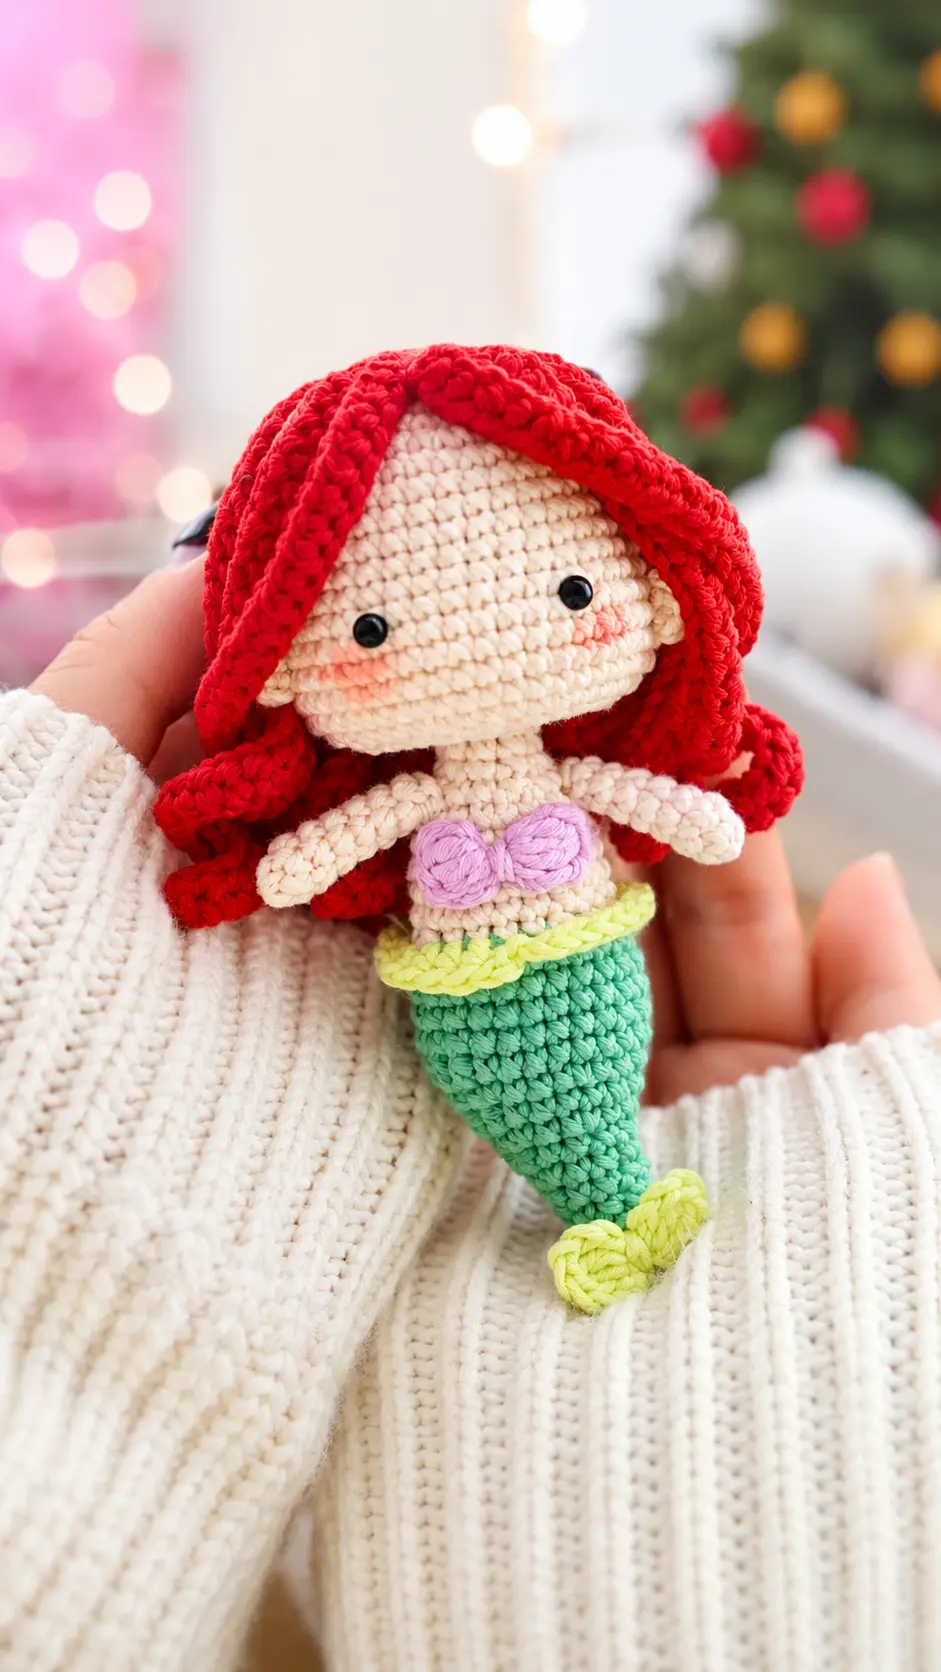
A couple of weeks ago, I was babysitting my niece for the afternoon while her parents ran some errands. We spent most of the day coloring, reading books, and digging through my craft supplies. At one point, she picked up a picture book filled with fairytale characters and became completely fascinated by the mermaid pages. She kept pointing at the bright red hair and sparkling tails, telling me all about the underwater adventures she imagined.
After she went home, I couldn’t stop thinking about how excited she had been. That evening, I pulled out some red and seafoam green yarn from my stash and started crocheting while watching television. Stitch by stitch, a tiny mermaid began to take shape. By the end of the night, I had the sweetest little doll sitting beside me on the couch, ready for her next ocean adventure.
This Free Amigurumi Pattern Ariel Mermaid Doll is inspired by that fun afternoon. With her bright red hair, adorable tail, and charming details, she is a delightful project that works up faster than you might expect. Whether you’re making her for a child who loves mermaids, creating handmade items for a craft fair, or simply enjoying a relaxing crochet session, this little doll is sure to become a favorite. Grab your crochet hook, pick out your favorite colors, and let’s bring this adorable mermaid to life together.
Materials Needed
- Yarn: sport or DK light weight yarn. (I used HELLO cotton yarn)
- Crochet hook: 2mm-2.5mm
- Safety eyes size 4mm
- Black embroidery thread
- Fiberfill
- Yarn needles
Abbreviations
- MR – magic ring
- sc – single crochet
- hdc – half double crochet
- dc – double crochet
- inc – increase (2 single crochet in 1 stitch)
- dec – decrease (invisible decrease)
- FLO – front loop only
- slst – slip stitch
Pattern Instructions
HEAD
Start with skin tone yarn.
Rnd 1. 6 sc in MR (6)
Rnd 2. 6 inc (12)
Rnd 3. [sc, inc] x 6 (18)
Rnd 4. [2 sc, inc] x 6 (24)
Rnd 5. sc, inc, [3 sc, inc] x 5, 2 sc (30)
Rnd 6. [4 sc, inc] x 6 (36)
Rnd 7. 2 sc, inc, [5 sc, inc] x 5, 3 sc (42)
Rnd 8-13. (6 rnds) 42 sc (42)
Rnd 14. [6 sc, inc] x 6 (48)
Insert the eyes between rnd 14 & 15 with 8-stitches space between them
Rnd 15-18. (4 rnds) 48 sc (48)
Rnd 19. [4 sc, dec] x 8 (40)
Rnd 20. [3 sc, dec] x 8 (32)
Rnd 21. [2 sc, dec] x 8 (24)
Rnd 22. [sc, dec] x 8 (16)
Rnd 23. [2 sc, dec] x 3, 4 sc (13)
Rnd 24-29. (6 rnds) BLO 13 sc (13)
Rnd 30. 6 dec, sc (7)
Cut the yarn. Pull the neck inside the head.
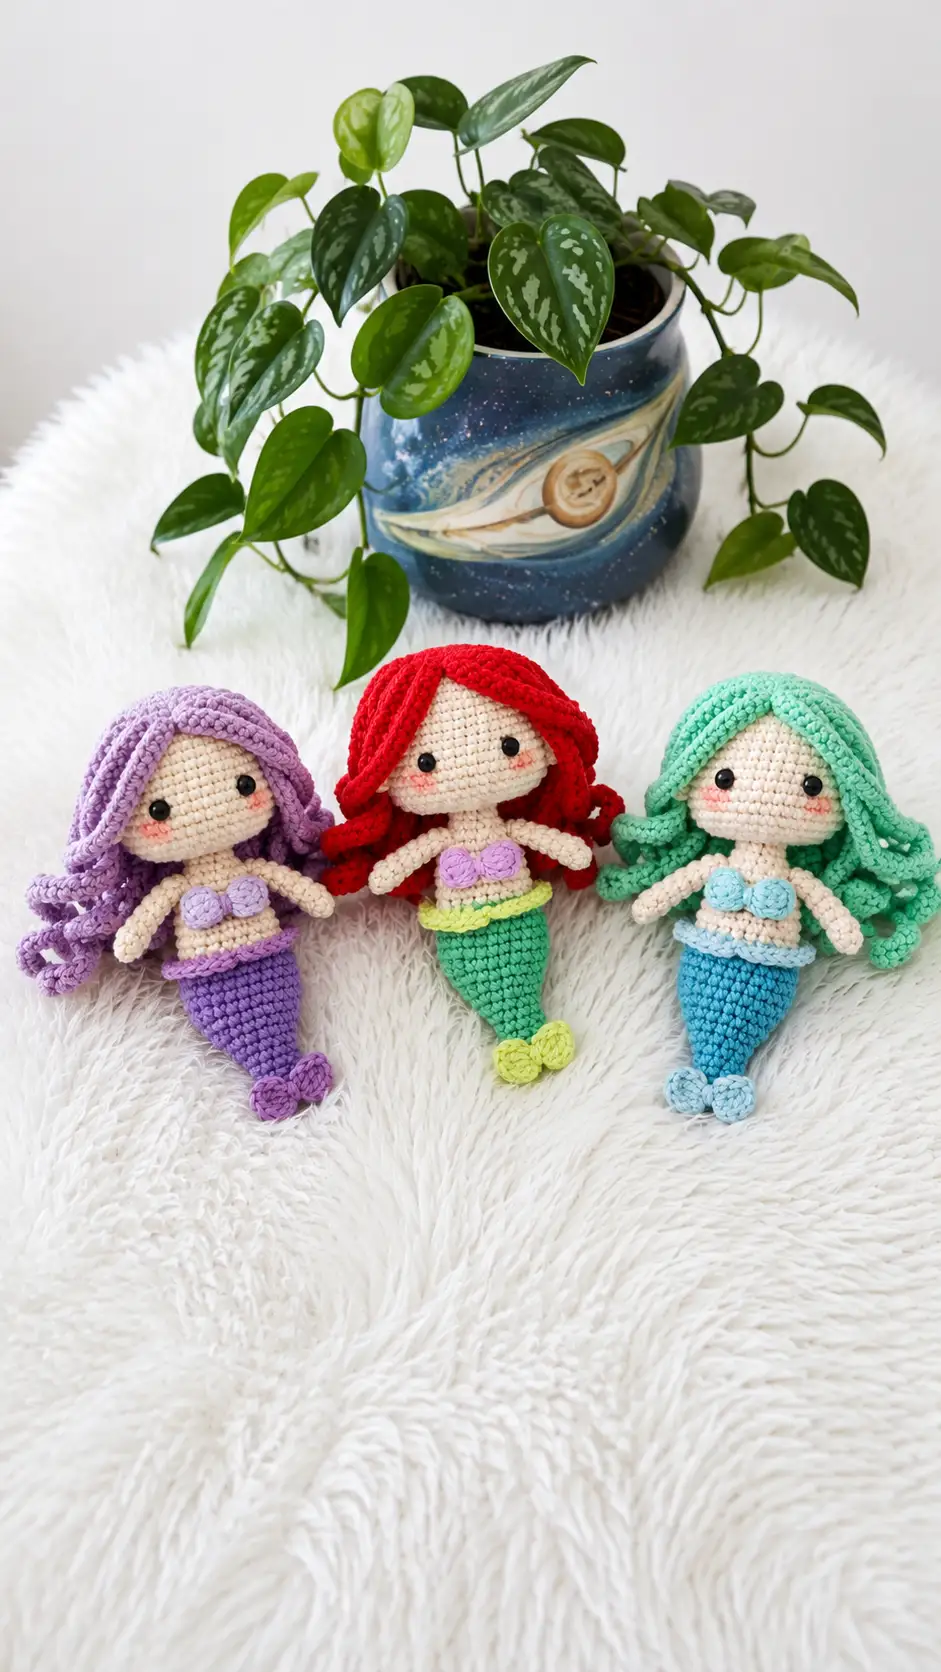
TAIL & BODY
Start with green yarn.
Rnd 1. 4 sc in MR (4)
Rnd 2. [sc, inc] x 2 (6)
Rnd 3. [sc, inc] x 3 (9)
Rnd 4. 5 sc, 4 hdc (9)
Rnd 5. [2 sc, inc] x 3 (12)
Rnd 6. 7 sc, 5 hdc (12)
Rnd 7. [sc, inc] x 6 (18)
Rnd 8. 11 sc, 7 hdc (18)
Rnd 9. [2 sc, inc] x 6 (24)
Rnd 10. 15 sc, 9 hdc (24)
Rnd 11-15. (5 rnds) 24 sc (24)
Switch to skin tone yarn.
Rnd 16. BLO [4 sc, dec] x 4 (20)
Rnd 17-21. (5 rnds) 20 sc (20)
Rnd 22. [2 sc, dec] x 5 (15)
Rnd 23. [sc, dec] x 5 (10)
Rnd 24. dec, 8 sc (9)
Rnd 25-30. (6 rnds) 9 sc (9)
Rnd 31. 4 dec, sc (5)
Cut the yarn. Close the remaining gap.
ARMS (make two)
With skin tone yarn.
Rnd 1. 6 sc in MR (6)
Rnd 2-7. (6 rnds) 6 sc (6)
Cut the yarn. Leave a long yarn tail for sewing. Sew to the body round 9.
EARS (make two)
With skin tone yarn.
Rnd 1. 3 sc in MR (3)
Cut the yarn. Leave a long yarn tail for sewing. Sew to the head spanning round 15 to round 16.
HAIR
With red yarn.
Rnd 1. 6 sc in MR (6)
Rnd 2. 6 inc (12)
Rnd 3. BLO [sc, inc] x 6 (18)
Rnd 4. [ch 23, [2 sc, 2 hdc] on chain, slst to the next st] x 2, [ch 33, [2 sc, 30 hdc] on chains, slst to the next st] x 16
Cut the yarn. Hide your yarn tail.
BRA
With purple yarn.
Rnd 1. [ch 3, 3 dc bobble into the foundation chain, ch 3, slst] x 2 (26)
Use your yarn tail to tie at the middle.
TAIL
With green yarn.
Rnd 1. [ch 3, 2 dc bobble into the foundation chain, ch 3, slst] x 2 (26)
Use your yarn tail to tie at the middle.
Tips for Success
- Use a stitch marker for small rounds: Since amigurumi is worked in continuous spirals, using a small stitch marker or a contrasting piece of scrap yarn helps you keep track of where each round starts, especially on small stitch counts.
- Stuff the neck firmly: To support the head and keep it from wobbling, push the neck section smoothly into place and add stuffing firmly around the neck area.
- Count your chain stitches carefully: When working on the hair strands, take your time counting the chains before working back down with your single and half double crochet stitches.
- Position safety eyes before stuffing: Double check the placement of your 4mm safety eyes between rounds 14 and 15 before you pack in the fiberfill so they sit evenly across the face.
- Pin parts before sewing: Use glass-head sewing pins to secure the ears, arms, bra, and hair cap in place before stitching them down. This lets you check symmetry from all angles.
Frequently Asked Questions
What yarn works best for this small mermaid doll?
A smooth cotton or cotton-blend yarn in sport weight or DK light weight gives clean stitch definition and helps small amigurumi hold their detailed shape really well.
Can I substitute a different hook size?
Yes, but try to stick with a smaller hook like a 2.0mm to 2.5mm. Using a small hook ensures your stitches stay tight so the fiberfill stuffing does not show through.
How do I attach the hair strands securely?
You can pin the hair cap onto the head first to arrange the long strands naturally around the face, then use a matching red yarn tail and needle to stitch the wig cap and individual strands down gently.
Is this pattern suitable for beginners?
Yes, as long as you know basic crochet stitches like single crochet, half double crochet, double crochet, and bobbles, you will find this project very approachable and fun.
How do I sew the tiny ears onto the head?
Leave a long yarn tail when finishing the magic ring for the ear. Use a tapestry needle to stitch across rounds 15 and 16, tying off on the inside of the head before closing it up.
Conclusion
I hope you have as much fun stitching this darling little mermaid as I did! Small projects like this are wonderful for relaxing afternoon crafting sessions and make such charming gifts for family, friends, or local craft displays. Grab your hooks, enjoy every round, and have fun creating with this Free Amigurumi Pattern Ariel Mermaid Doll!


Leave a Comment